
How to Transplant (or Plant) Blueberries
This post may contain affiliate or sponsored links. Please read our disclosure policy.

This spring, I received a very special gift from my parents who were moving–FIVE BLUEBERRY BUSHES from their backyard! These bushes are about three years old, so they are already producing quite a few blueberries each year but still have some growing to do. After doing some major research about how to transplant blueberries, my husband and I got to work. And, I’m happy to report that our blueberry bushes are currently thriving now seven weeks later. They are well on their way to producing a lot of blueberries! You can see the results after about a month and half in our backyard at the bottom of this post.
Thinking about putting in some blueberry bushes at some point? Or, do you have some that need to be moved this fall? Here is a step-by-step tutorial of how to transplant blueberries, based on my research and experience. Pin this one for later!
How to Transplant Blueberries
1 –Decide on Your Transplant Location
Ideally, you want to transplant your blueberries when the bush is dormant (so after the first frost would be a good time). Find a location to transplant your blueberries that provides plenty of sunshine. Make sure each plant will have ideally 3 feet on either side. (We had to plant ours a little closer than that due to lack of space. My mom’s were closer than 3 feet and produced just fine, too.) Blueberries produce the best crop in soils high in organic matter and with good drainage, as well as soil that is acidic (a pH balance around 5.0). I will later discuss ways that you can help enhance your soil naturally in almost any location.
2 – Gather and Purchase Supplies
Here’s what you’ll need…
- gardening gloves
- a shovel
- a hand spade
- top soil – I found that I needed a little less than 1 small bag per blueberry bush, when mixed with the peat moss below.
- peat moss – Buy enough to mix in with the top soil so there is about a 50/50 mix of each to surround each blueberry bush. This will help keep the soil loose.
- a wheel barrow – This is helpful when mixing the soil and peat moss or moving the blueberry bushes to the new location.
- Blood Meal – plant food
- pine mulch or pine needles – Either of these will help create an acidic soil environment for your blueberries, which they love.
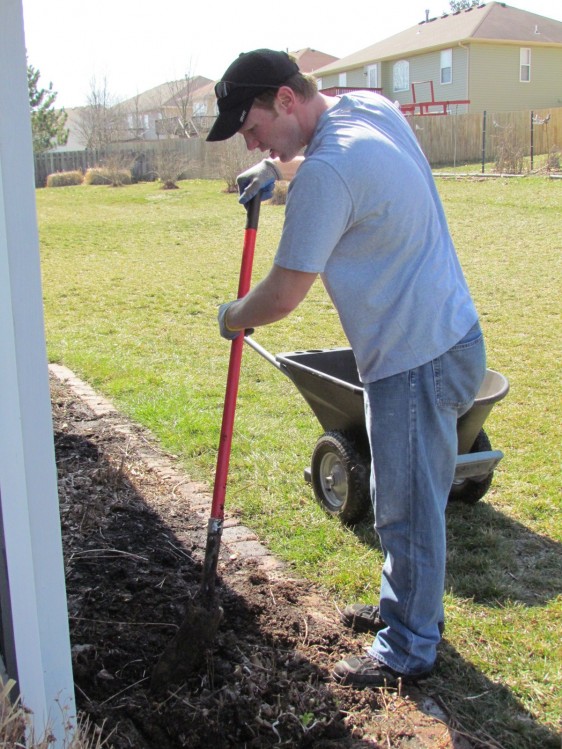
2 – Dig Up the Bushes from Original Site
Wait until your plants are dormant (tops are dry and brittle), usually after the first frost of the year. When digging up the blueberry bushes from their original location, be sure to dig far enough around and down to keep as many roots in tact as possible. I stored mine in trash bags and buckets for about five days in cool weather on my back porch until we were ready to plant them. I made sure they stayed moist during that time, and they did fine. But, ideally you want to move them to the new location as soon as possible.

3 – Dig a Hole in New Location
If you are planting more than one blueberry bush, plan out where you want each bush. I set each of mine on top of the soil in their buckets/trash bags to see which order I wanted them in and to eyeball how big of a hole I would need. Dig about 10-15 inches deep, depending on how big your roots are for each plant.
4 – Place Your Plant in the Hole
Fill in the bottom of your hole with the top soil/peat moss mixture. (I did this to make sure there was nutrient-dense, loose soil below my plants as well as on all sides.) Set your plant in and see if the stem reaches ground level. If not, add more of the soil mixture. Remember, the soil will settle a little bit so add a bit more than you think is needed.
5 – Fill In
Once you have your plant at the right height in the hole, fill in around the plant with additional soil until filled. Sprinkle some of the blood meal around plant as plant food. In addition, the smell helps keep the rabbits and deer away. If you plant them near your house, like we did, make sure the grade of the slope is away from your house.
6 – Add the Pine Mulch
Add pine mulch or pine needles around your blueberries. This will help to add acidity to the soil, which is the ideal soil condition for blueberry plants.
7 – Water
Water your new plants and you’re done for the day! Continue to water the bush(es) until the ground freezes every 2 or 3 days.
Another tip: Add vinegar, coffee, and/or coffee grounds to your water to add even more acidity to the soil. I have been doing this every time I water my plants for the past few weeks and they love it!
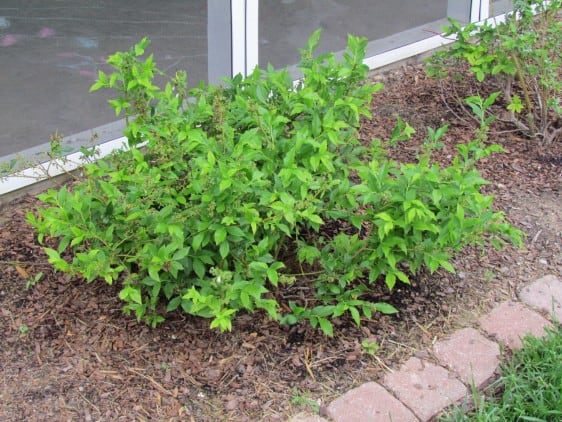
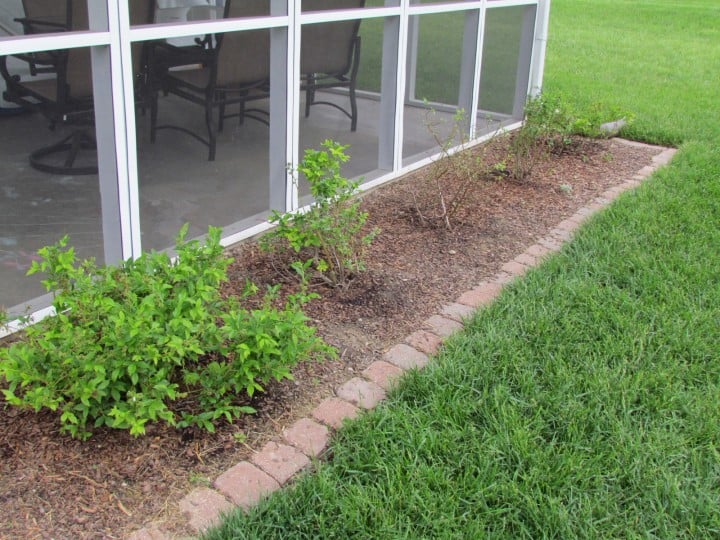
I have a few different varieties here in my little mulch bed. The ones on the end are fuller, but the middle ones still have plenty of berries forming, as well. I think another year of good soil, sunshine and TLC and they will be back to fighting condition (fingers crossed!).
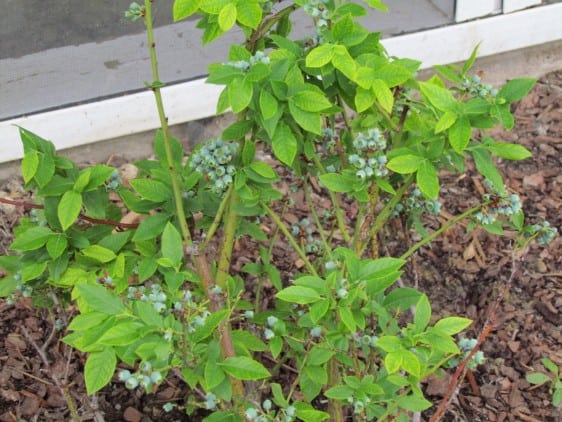
See my little blueberries forming? My kids can’t wait to get their little paws on them!
I hope my research and tips assist you well with how to transplant blueberries!
Top picture credit: http://www.freedigitalphotos.net/
thank you for the tips
I have 70 older blueberry bushes that I have to transplant this year. I am moving and they will go with me. If you have to take them before the first frost,,is there anything different that you would do..
I love the spot you picked to transplant your blueberries. That’s a treat to see from your porch.
You did a great job transplanting the blue berry bushes from our old house. The four smaller plants are Northsky (2) and Top Hat (2). Those bushes are dwarf so it is okay to plant them a little closer together. The bush in the middle is a larger variety and I don’t recall it’s name. Once it takes off we will have to keep it trimmed back. Having the different varieties helps guarantee lots of berries. Good luck. Mom (Rachel’s mom)