How to Video
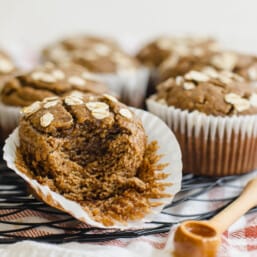
Gluten Free Banana Muffins
You will never miss the wheat flour in these muffins! They are deliciously moist and packed with protein, fiber, and more feel-good ingredients.
Ingredients
- 1 cup rolled oats (plus 1/4 cup more for optional garnish; look for gluten-free oats, if avoiding gluten)
- 1/2 cup almond flour (or almond meal)
- 1/4 cup ground flaxseed
- 1 teaspoon baking soda
- 1 1/2 teaspoons ground cinnamon
- 2 eggs
- 1/4 cup honey
- 1/2 cup almond butter (sub: any nut butter; If you use a nut butter without salt, add in a pinch of salt to the recipe.)
- 4 medium bananas (ripe or overripe)
- 2 teaspoons pure vanilla extract
- Optional garnish: 1/4 cup mini chocolate chips (I like Enjoy Life Dairy-Free Mini Chocolate Chips.)
Instructions
- Preheat oven to 375° F. Spray a muffin tin with cooking spray and/or line the tin with cupcake liners. (See Cooking Notes below for tips about the tin.)
- To a large high-powered blender, add the oats and blend until fairly smooth. Then, add the rest of the ingredients to the blender and secure the lid. Start blending on low and increase speed until the wet ingredients are well blended and batter is smooth and creamy. You will have to stop and stir a few times, scraping down the sides.
- Pour or scoop the batter into the muffin tin, filling each cup until almost full (about a heaping 1/4th cup of batter per muffin.) Sprinkle a pinch of rolled oats or mini chocolate chips on top of each muffin, if desired. If you really scrape out as much batter as you can, you'll end up with 15 muffins.
- Bake for 15-18 minutes, until the tops of your muffins are set and a toothpick inserted into the middle comes out pretty clean (you may see just a few crumbs on the toothpick). Note that silicone pans may require about 5 minutes more of bake time.
- Allow muffins to cool in pan for about 10 minutes before removing to a cooling rack. They are delicious warm and with a little butter on them. Once they are fully cooled, store in an air-tight container for up to a week in the fridge or freeze using directions below.
Freezer Instructions
Freeze For Later: Bake muffins as directed in recipe. Let cool completely. Once cool, place muffins in freezer safe bag or container, squeeze out as much air as possible, and seal tightly. Freeze for up to 3 months.
Prepare From Frozen: Thaw desired amount of muffins overnight in the refrigerator or warm them slightly in the microwave.
Notes/Tips
- A high powered blender is needed for this recipe. If you don't have one, you can blend the wet ingredients and dry ingredients separately by hand (really mash up those bananas!). Then combine the two to make the batter.
- Letting the muffins rest in the pan before removing them for 10 minutes is really important. It will help them keep their shape and not fall apart.
- If using a metal pan, I recommend using paper or silicon muffin liners for easier clean up.
- Cooking Time: If using a silicone pan, my tests showed these need to bake 2-3 minutes longer to get done.
- These muffins are a bit denser than a muffin made with wheat. Expect them to deflate a little after they cool off.
Nutrition
Serving: 1 muffin | Calories: 163 kcal (8%) | Carbohydrates: 19 g (6%) | Protein: 5 g (10%) | Fat: 9 g (14%) | Cholesterol: 22 mg (7%) | Sodium: 84 mg (4%) | Fiber: 3 g (13%) | Sugar: 9 g (10%)
If you make this, please leave a review and rating letting us know how you liked this recipe!