• Skip to primary navigation
  • Skip to main content
Get our Freezer Meal Quick Start Guide
freezer meal quick start guide

Get Our Freezer Meal Quick Start Guide

Loading

About
Free Resources
Contact

Instagram

Facebook

Pinterest

YouTube

TikTok

Thriving Home

Food & Lifestyle

  • Recipe Index
    • Course
      • Breakfast
      • Lunch & Dinner
      • Sides & Salads
      • Soups & Chilis
      • Appetizers
      • Snacks
      • Desserts
      • Baked Goods
      • Beverages
      • Condiments
    • Method
      • Freezer Meals
      • Stovetop
      • Oven
      • Slow Cooker
      • Instant Pot
      • Grill or Smoker
      • 6 Ingredients or Less
    • Diet
      • Gluten-Free
      • Dairy-Free
      • Vegetarian
    • Ingredients
      • Chicken & Turkey
      • Beef
      • Pork
      • Seafood
      • Pasta & Pizza
    • Holiday
      • Birthday
      • Christmas
      • Easter
      • Halloween
      • Thanksgiving
      • Valentine's Day
    • All Recipes
  • Freezer Cooking
    • Start Here
    • Freezer Meal Recipes
    • 1 Hour Freezer Prep
    • Cookbooks
  • Menu Plans
  • Shop
    • Cookbooks
    • 1 Hour Freezer Prep
    • Shop Our Favorites
    • Gift Guides
Search...
Home Instagram

Hi! We're so glad you're here.

Scroll down to find the Instagram post you’re looking for.

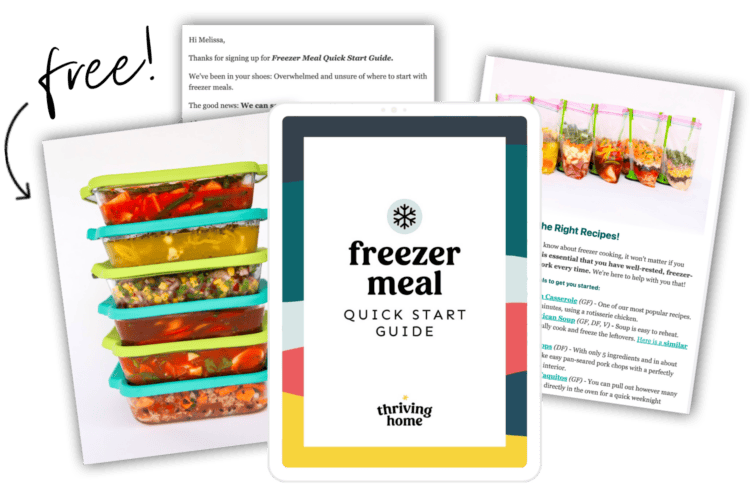
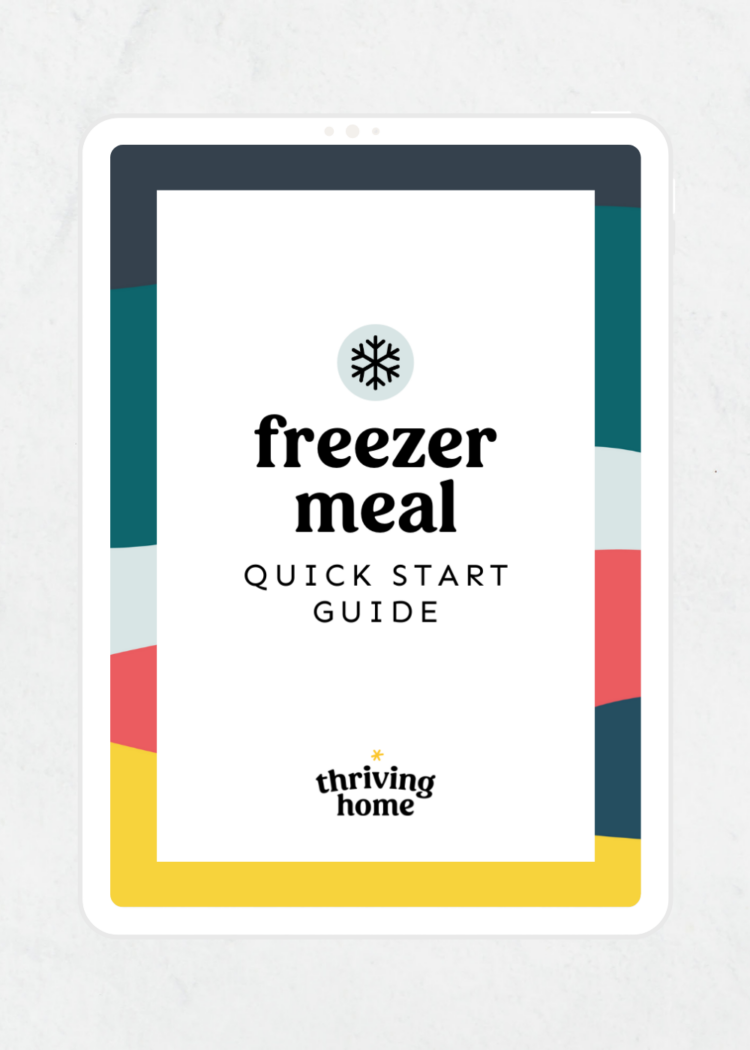
Grab Our Freezer Meal Quick Start Guide!

5 days of easy recipes and pro tips from freezer meal experts.

Loading

thrivinghome

View

Feb 4

Open
As long as you have a turkey carcass on hand, you can make this broth! Use whatever root veggies/aromatics, fresh herbs, and seasonings you want! 

Ingredients
- 1 turkey carcass 
- Leftover veggies & fresh herbs (either from roasting a turkey or using what you have on hand), like a cut up onion, a few cut up carrots, a few stalks of celery, 1-2 garlic cloves, a handful of fresh parsley, 1-2 thyme or rosemary stems
- Enough water to cover the carcass (about 10-12 cups)
- Optional seasoning: peppercorns, bay leaf

Instructions
1. Place a turkey carcass, any leftover veggies or herbs from roasting the turkey breast (or any fresh ones you have on hand), and enough water to cover the carcass in a large stock pot or in a 6+ quart slow cooker or Instant Pot. You can also throw in ½ teaspoon peppercorns or a bay leaf.
2. Cook the turkey broth using one of these methods:
Stovetop: Bring to a boil, reduce to a simmer, and simmer, uncovered, for 2-3 hours.
Crockpot: Cover with the lid and slow cook on LOW for 8-12 hours.
Instant Pot: Lock and seal the lid. Cook at high pressure for 45 minutes with a quick release. 
3. Using a colander/strainer over a large bowl or pot, strain out the solids from the broth. Let cool on the counter up to 2 hours only (then must be refrigerated to be safe!).
4. Either refrigerate and use within 3-5 days or divide into freezer containers–like mason jars, Souper Cubes, or Pyrex containers with lids (leave at least 1 inch head room for expansion)–and freeze for up to 3 months.

Clickable link in bio ➡️ https://thrivinghomeblog.com/turkey-broth/

#turkeybroth #homemadebroth #homemadesoup #turkey #easyrecipes #easymealprep #easyrecipe #easyfood

thrivinghome

View

Feb 3

Open
Inspired by P.F. Chang’s recipe, these Chicken Lettuce Wraps are a hit with all ages!😍🔥 

Easy to make, filled with good-for-you ingredients, and easy to freeze.🥳🤩 Happy Freezer Meal Friday!

Recipe > https://thrivinghomeblog.com/chicken-lettuce-wraps/

#freezermealfriday #mealprep #dinnerprep #easysnacks #healthysnacks #healthymealprep #mealprepforfamilies #dinnersthatkidslove

thrivinghome

View

Feb 2

Open
Easy and delicious crockpot recipes… this is what we do!🥰🤩

Even better, we’ve rounded up 15+ amazing dump-and-go slow cooker recipes. Every single one is freezer-friendly and includes instructions on how to prep it ahead and thaw it.🥳😋

All recipes on our blog! Link in our bio!

https://thrivinghomeblog.com/dump-and-go-slow-cooker-recipes/

#crockpotrecipes #crockpot #slowcookerrecipes #slowcooker #easydinner #mealprep

thrivinghome

View

Feb 2

Open
Don’t risk messing up your next baking recipe. Try this simple test to find out if your baking powder is still active. I learned this in my favorite cookbook, The New Best Recipe, by @testkitchen. - Rachel

thrivinghome

View

Feb 1

Open
This easy Instant Pot Mac and Cheese recipe takes just 6 main ingredients and 18 minutes from start to finish, dirties only one pot, and tastes creamy and delicious!😍🧀🍜

Plus, it’s made with all real food ingredients (see ya, Kraft)🤭👋🏼

Get the recipe on our blog! Thriving Home💛

thrivinghome

View

Feb 1

Open
Is there a player's handbook for this??😂

thrivinghome

View

Jan 31

Open
I go through my share of kitchen tools. Here are 3 I have been loving these days!
 
1️⃣ Silicone Can Strainer: This makes straining the juices out of canned goods so easy. No big colander needed.

2️⃣ Multipurpose Scraper: I use this for SO many tasks in the kitchen. Primarily to move chopped food around or scrape flour off the counter. 

3️⃣ Avocado Slicer: I swear by this thing. It slices and pits an avocado without any chance of cutting yourself. I use mine ALL THE TIME.

Hop to the link in our bio for links to these and more kitchen tools under $15 we love!

https://thrivinghomeblog.com/shop/kitchen-tools-we-love/

thrivinghome

View

Jan 31

Open
With just a handful of simple seasonings, these chicken thighs come out crispy on the outside and amazingly tender and juicy on the inside😍🍗

Baked chicken thighs are so easy to make and we show you how to turn them into a make ahead freezer meal too!😋🥳

Recipe on our blog! Link in our bio!

https://thrivinghomeblog.com/italian-baked-chicken-thighs/

#chickenrecipes #easydinner #dinnerrecipe #chickenthighs #healthydinner #familydinnerrecipe #mealprep

thrivinghome

View

Jan 30

Open
With 3 simple steps, you’ll have finger-licking good BBQ Chicken Sliders🍗🍔😋

The perfectly seasoned, shredded chicken breasts are served on mini buns and topped with BBQ Sauce to make an easy weeknight meal or a scrumptious meal for groups of people😍🥳

Recipe on our blog! Link in our bio! 

https://thrivinghomeblog.com/bbq-chicken-sliders/

#easydinners #dinnerrecipe #chickenrecipe #slidersrecipe #sandwhichrecipe #lunchrecipe

thrivinghome

View

Jan 29

Open
Here is our weekly meal plan! 🥳🥰😋

Check out the corresponding deals at your local Hy-Vee #sponsored

thrivinghome

View

Jan 28

Open
Italian Baked Chicken Thighs are the most amazing, flavorful, juicy chicken thigh recipe you’ll find! 

Follow @thrivinghome for more easy, delicious family dinners! 
Ingredients
6 bone-in, skin-on chicken thighs (about 2 lbs)
2 tbsp avocado oil (or olive oil)
2 tsp garlic powder
2 tsp onion powder
1 1/2 tsp salt
1 tsp pepper
1 tsp Italian seasoning, crushed in hand
1 tsp poultry seasoning
1/2 tsp paprika

Make It Now:
1. Preheat oven to 400°F. Line a large, rimmed baking sheet with foil.
2. In a small bowl, mix together the garlic powder, onion powder, salt, pepper, Italian seasoning, poultry seasoning, and paprika.
3. Arrange the chicken on the baking sheet. Pat dry with paper towels and trim off any excess skin/fat. Drizzle the oil evenly over the chicken and rub in on all sides. Sprinkle the seasoning evenly over the chicken and rub in on all sides.
4. Bake the chicken, skin side up, for 40-45 minutes, until done. Chicken should reach an internal temperature of 165°F and/or have no more pink inside. Optional: You can turn on the broiler and broil the chicken for a few minutes to get the skin even crispier, if desired. 

Clickable link in bio ➡️ https://thrivinghomeblog.com/italian-baked-chicken-thighs/

#bakedchicken #italianbakedchicken #easyfreezermeals #freezermeal #chickendinner #chickenrecipes #chickenthighs #easyfamilyrecipes #easyfamilydinners #familydinner #familymeals

thrivinghome

View

Jan 27

Open
Freezer Friday! 🥶🥶

Meatloaf Muffins! 🔥🔥

Prep ahead for healthy lunches, whip up for a quick dinner, and even make a double batch so you can freeze one for later. All ages love this meal😍😍

Recipe > https://thrivinghomeblog.com/freezer-meal-mini-meatloaf-muffins-2/

thrivinghome

View

Jan 26

Open
When you grill a pork tenderloin instead of baking it, you still get the flavor and moistness but the bonus is the extra char-crispiness that coats the outside of the tenderloin.

Bookmark this post to save the recipe below. It’s also linked to in our bio if you want to print it off. 

INGREDIENTS
1 teaspoon garlic powder
1 teaspoon dried oregano
1 teaspoon ground cumin
1 teaspoon ground coriander
1/2 teaspoon ground thyme
1 teaspoon salt
1 1/4 pounds pork tenderloin 

INSTRUCTIONS
1. Preheat the grill to 450°F degrees.
2. Combine the garlic powder, dried oregano, ground cumin, ground coriander, ground thyme, and salt in a small bowl. Then, rub the seasoning in on all sides of the pork tenderloin.
3. Place your seasoned tenderloin on the grill and let it sizzle with the lid shut for 7 minutes.
4. Flip and shut the lid. Then, let it cook for 5-6 more minutes.
5. Now turn the heat off, and leave the lid closed for 4-5 minutes. 
6. Remove tenderloin from heat and let rest for 7-8 minutes before slicing.

https://thrivinghomeblog.com/how-to-grill-a-pork-tenderloin-using-the-7-6-5-method/

thrivinghome

View

Jan 26

Open
🤩 This easy, nutritious favorite takes less than 30 minutes and packs a healthy punch, without losing out on flavor. So much goodness in so little time! 

Follow @thrivinghome for more easy weeknight meals! 

Ingredients
* 2 medium sweet potatoes, peeled and diced into 1/2 inch cubes (about 2 cups)
*2 cups of Brussels Sprouts, stemmed and cut in half
*2 tbsp avocado oil
*1/2 tsp salt, plus more to taste
*1/4 tsp pepper, plus more to taste
*12 oz package of all-natural Smoked Chicken & Apple Sausage or Italian Style Smoked Chicken Sausage cut into 1/2 inch slices (Look for the sausages with the fewest additives/preservatives in the ingredient list) 

Instructions
1. Place a large rimmed baking sheet in the oven and preheat to 425°F.
2. Meanwhile, place the diced sweet potatoes and sliced Brussels sprouts in a mixing bowl. Add the oil, salt, and pepper and stir until coated with oil. 
3. Using oven mitts, carefully remove the hot sheet pan. Dump the veggie mixture onto the pan. Sprinkle the sliced sausage around the pan to equally distribute among the veggies. Shake the pan or use a spatula to spread everything out so each piece is touching the pan and not too crowded.
4. Bake for about 20 minutes, stirring halfway through. Taste and season with more salt and pepper, as needed. Note: The Brussels sprouts and sausages will be browned on both sides and the sweet potatoes will be softened when done. See more about sweet potatoes below.

Clickable link in bio ➡️ https://thrivinghomeblog.com/sheet-pan-sausage-and-veggies/

#easyfamilydinner #familydinner #mealprep #mealprepping #freezerfriendly #dinnerideas #dinner

thrivinghome

View

Jan 25

Open
Lucy wanted to show you her special trick.

It’s mostly hilarious but terrifying when you are in the bathroom 😳.

thrivinghome

View

Jan 25

Open
Maybe not every part will be missed...

thrivinghome

View

Jan 24

Open
Imagine prepping a different, nutritious breakfast for each day of the week in just 10 minutes. That’s the magic of our super popular 7 Overnight Oats recipes!

We like to grab the ingredients at our local Hy-Vee, because they’re always well-stocked. Here’s what you’ll need:

- 16 ounce Mason jars
- Old fashioned rolled oats
- Honey or pure maple syrup
- Fresh or frozen fruit
- Your favorite add-ins: nuts, nut butter, flaxseed, chia seeds, cinnamon, mini chocolate chips, etc.

Try one of these 7 amazing combos:

1. Almond Joy
2. Strawberry Shortcake
3. Peanut Butter and Jelly
4. Blueberry Muffin
5. Raspberry Lemon
6. Peach Pie
7. Peanut Butter Cup

To get all 7 recipes and our free printable cheatsheet, click the link in our Bio or copy and paste the URL below.

https://thrivinghomeblog.com/7-overnight-oats-recipes/

thrivinghome

View

Jan 24

Open
This easy, budget friendly Instant Pot Mac and Cheese recipe takes just 6 main ingredients!🧀🤩

Is a total of 18 minutes from start to finish!

Dirties only one pot!

And tastes creamy and delicious! 

Plus, it’s made with all real food ingredients!

See ya, Kraft!

Recipe on our blog! Link in our bio! 

https://thrivinghomeblog.com/instant-pot-mac-and-cheese/

#budgetfriendly #budgetfriendlyrecipes #weekdaymeals #easydinner #budgetfriendlydinner

thrivinghome

View

Jan 24

Open
These bad boys were a crowd-pleaser the other night. And trust me, with the ever-shifting big feelings about food in my home, a meal that everyone likes is a big win! 

Ingredients
1–2 tbsp olive or avocado oil
1/2 green bell pepper, diced (or more, if you’d like)
1 small yellow onion, diced
1/2 cup diced portobello mushrooms (or more, if you’d like)
2 garlic cloves, minced
Salt & pepper
1 lbs lean ground beef
A pinch of red pepper flakes
2 tbsp Worcestershire sauce
6 tbsp softened butter
12 slices Provolone cheese
12 slices sourdough bread

Instructions
Make It Now:
1. Make the Filling: In a large saute pan, heat oil over medium-high heat until shimmering. Saute bell peppers, onions and mushrooms until they begin to soften, about 4-5 minutes. Stir in garlic and cook about 30-60 more seconds. Season the veggies lightly with salt and pepper and then remove to a medium-sized bowl (you’ll use this later for the meat, so make sure it’s at least medium-sized).
2. Add the ground beef to the same saute pan and cook, breaking it up with a wooden spoon or spatula along the way, until there is no longer any pink showing. While it cooks, season the meat with 1 teaspoon salt, 1/2 teaspoon pepper, and a pinch of red pepper flakes. Drain any excess grease.
3. Stir in Worcestershire sauce and the cooked veggies until everything is combined. (Freezing instructions begin here.) Remove the meat mixture to the bowl the veggies were in earlier. Wipe out the pan until clean.
4. Build the Sandwiches: Lay the bread slices on a cutting board and butter one side of each piece of bread. Then lay them butter side down. On the inside of one piece of bread, place a slice of cheese, scoop about 1/3 cup of the beef mixture on top of that, top with another slice of cheese, and place another piece of bread on top (butter side up).
5. Grill the Sandwiches: Place the saute pan over medium-low heat. Grill each sandwich for 2-3 minutes per side, until the outside is browned and cheese is melted.
Grab the freeze instructions on the blog! Clickable link in bio: https://thrivinghomeblog.com/ground-beef-philly-cheesesteak-sandwiches/

#phillycheesesteak #familyfriendly #easyfamilymeals #easyrecipes

thrivinghome

View

Jan 22

Open
Our weekly menu plan!🥳

Check out your local Hy-Vee for weekly deals and you can be sure to find recipes on our website using those ingredients!😋🥰

#sponsored
SHOW ME MORE! FOLLOW THRIVING HOME
Privacy Policy
Accessibility
Disclaimers
Contact
© 2023 Thriving Home
Site Credits
Designed by Melissa Rose Design Developed by Once Coupled
Back to Top