How to Hang a Picture Straight EVERY Time: My Favorite Decorating Hack!
Hanging a perfectly straight picture can be a challenge. With this simple picture hanging hack, you will never have crocked pictures on your walls again!
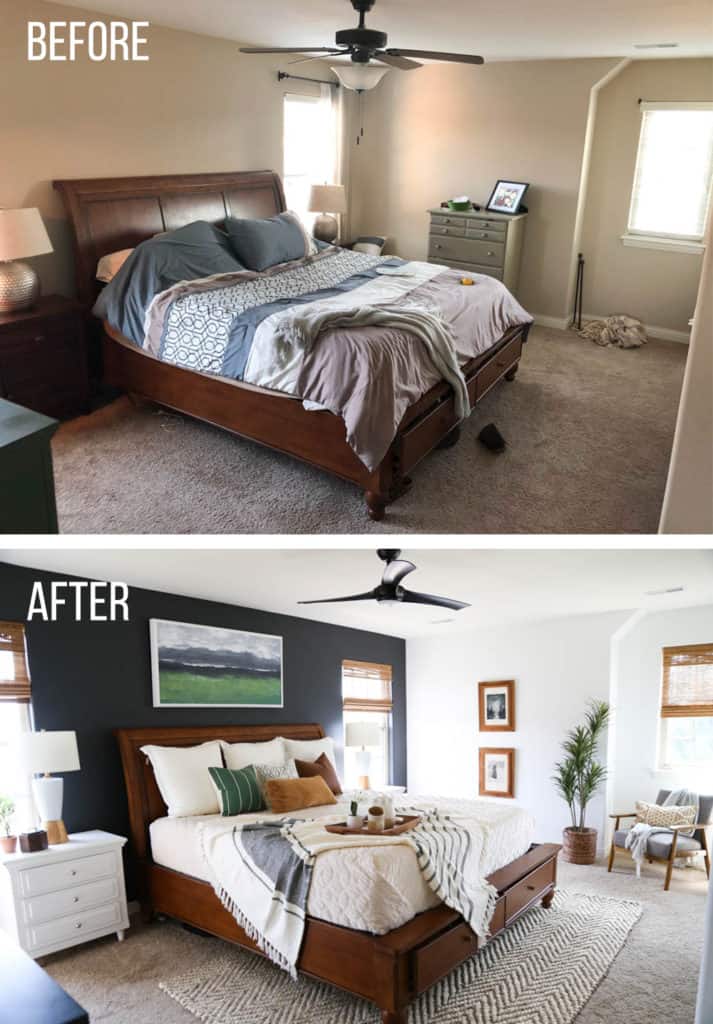
If you spend much time around here, you know I love to update and improve my home. Whether it be my Master Bedroom Makeover (which has gotten over 100K pageviews!) or my Kid’s Bathroom Flip, I have hung my share of pictures, paintings, shelves, and decor.
When I learned this hack on how to hang a picture perfectly level, I have never struggled with the problem since!
How to Hang a Picture Perfectly Level (My favorite hack!)
I wish SO MUCH that I had known about this little life hack on hanging pictures a long time ago. It would have saved me from much frustration, time and unnecessary holes in my walls.
Here’s the trick:
STEP ONE:
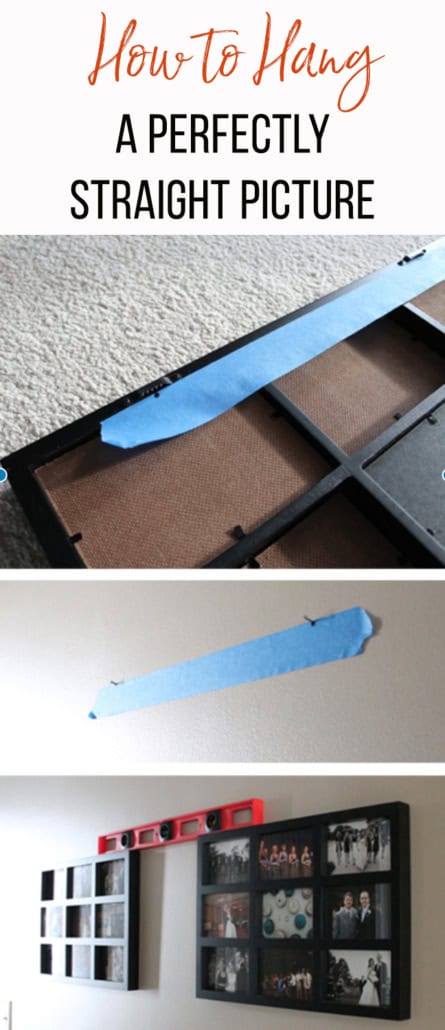
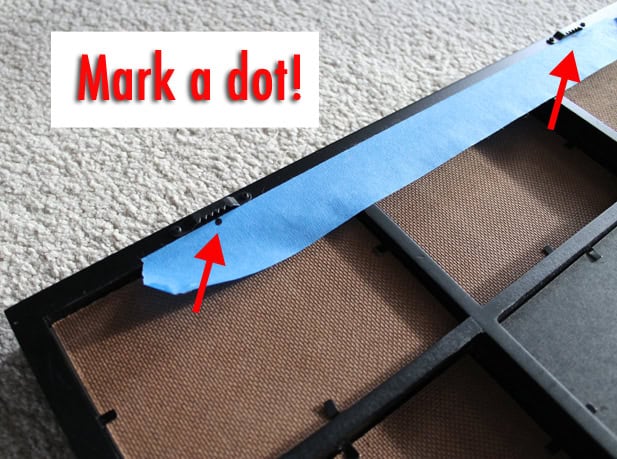
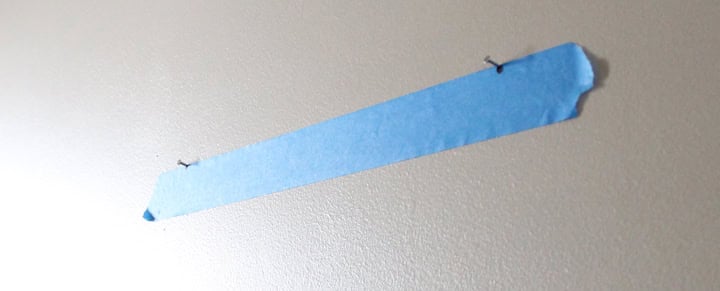
For a frame with two brackets on the back, place a piece of painters tape across the back. Mark on the tape exactly where the nails or screws need to go.
STEP 2:
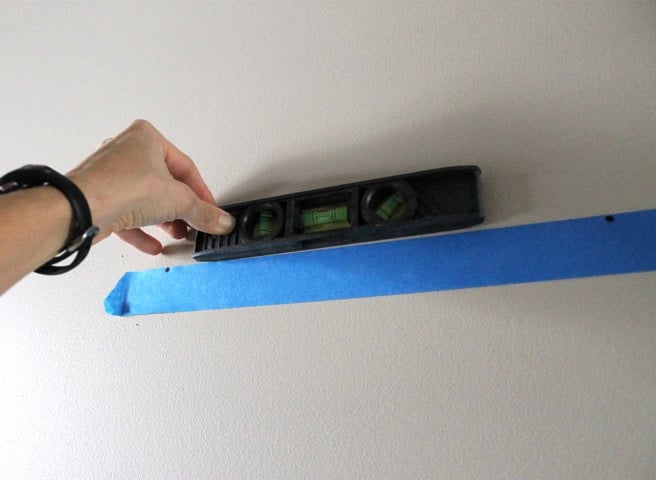
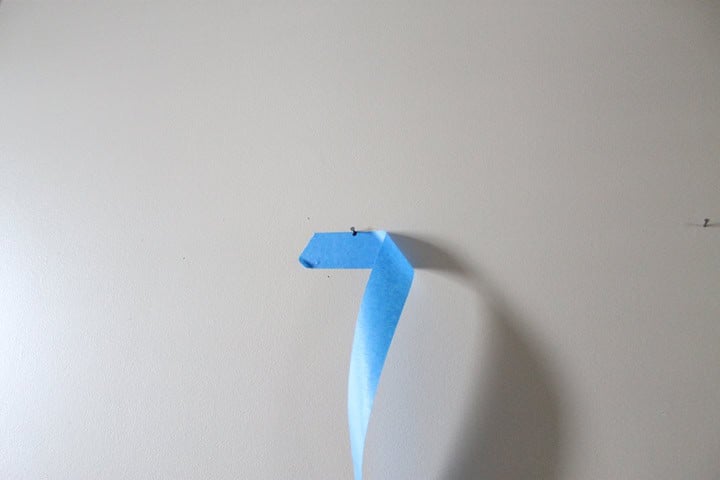
Take your marked tape and place it on the wall where you want your pictures to hang. Use a level to make sure your tape is perfectly straight.
STEP 3:
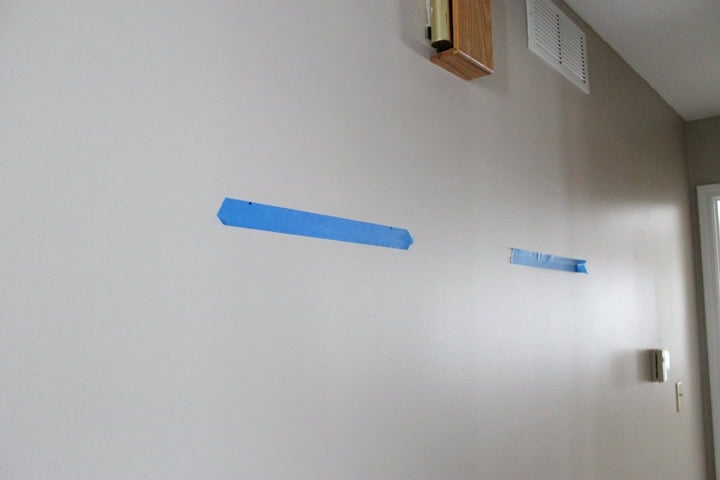
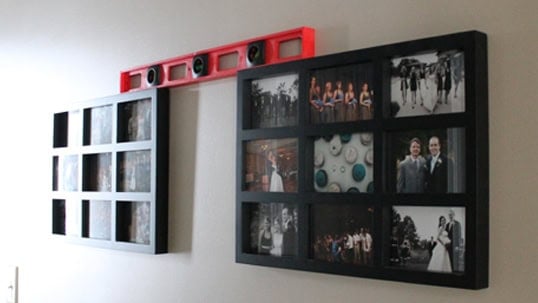
If you want to hang two frames next to each other, do the same thing for the second frame and make sure the strips of tape are level with one another.
STEP 4:
Hammer your nails in on the dots you previously marked.
STEP 5:
Remove your tape and hang your pictures!
Perfectly level on the first try!
I’ve used this method for hanging things SO much and it’s worked every time.
MAKE SURE TO CHECK OUT MY MASTER BEDROOM MAKEOVER, TOO!
Worked perfectly, thanks so very much!
Wonderful! Glad it was helpful, Mary.
My pic holes were not the same, so to fix that issue, I put the tape across the top edge that I wanted to match up, then poke the holes accordingly. This worked for all of my pics and they were perfect !
Love your hacks!!
this only works if both hooks are exactly even on the back of the picture, no?
Hi Ken,
Since no one else answered your question, I imagine you are still struggling to hang the picture over 4 years later. I am here to help.
You want to make sure the tape is aligned with the top of the frame first, then you can mark where you need your nails, and finally level the piece of tape on the wall for nailing. This way, your marks will be the same amount “off level” on your tape as the hooks are on the frame itself.
I hope this helps and good luck finally getting your picture hung!
thank you soo much for this hack . now i know I DO NOT NEED A MAN TO DO THIS OR ANYTHING ELSE FOR ME. PRICELESS
This cracked me up. So glad this was helpful!
This will NOT WORK if the locations of the nails are not exactly symmetrical with respect to the 2 edges of the painting! Here’s how to get that to work though. Put the tape on the back of the frame as indicated and mark the nail hole location, but then draw a line straight down, across the width of the tape \ to the opposite (bottom edge) side of the tape. You can then flip the tape around when you put it on the wall (so what was the right side on the painting stays on the right sideon the wall, but the tape is now upside down from what it was. If your nail heads were at the top of the tape on both sides you are good to put them in on the top of the now flipped tape at your mark. If for some reason, the nail indication is not at the very top you then have to put the nail into the tape at the new top but down by the same amount as the nail indication on the lower edge of the tape is now higher than the edge.