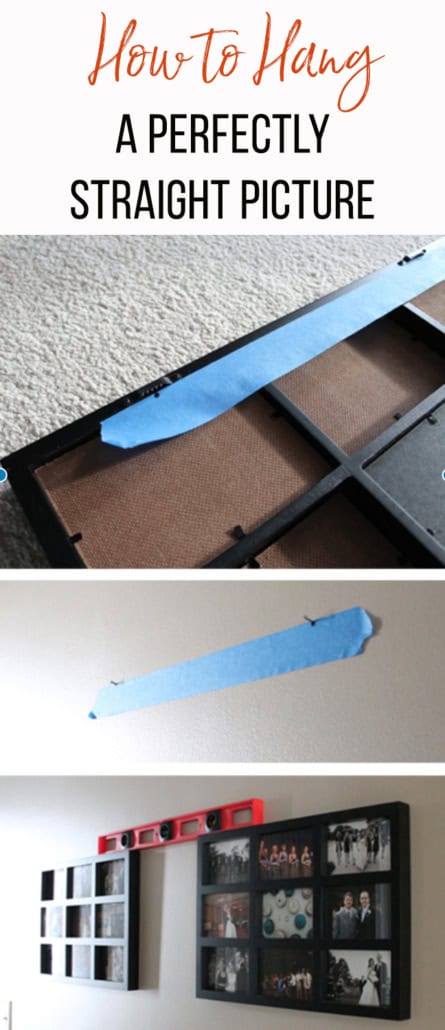
How to Hang a Picture Straight EVERY Time: My Favorite Decorating Hack!
Hanging a perfectly straight picture can be a challenge. With this simple picture hanging hack, you will never have crocked pictures on your walls again!
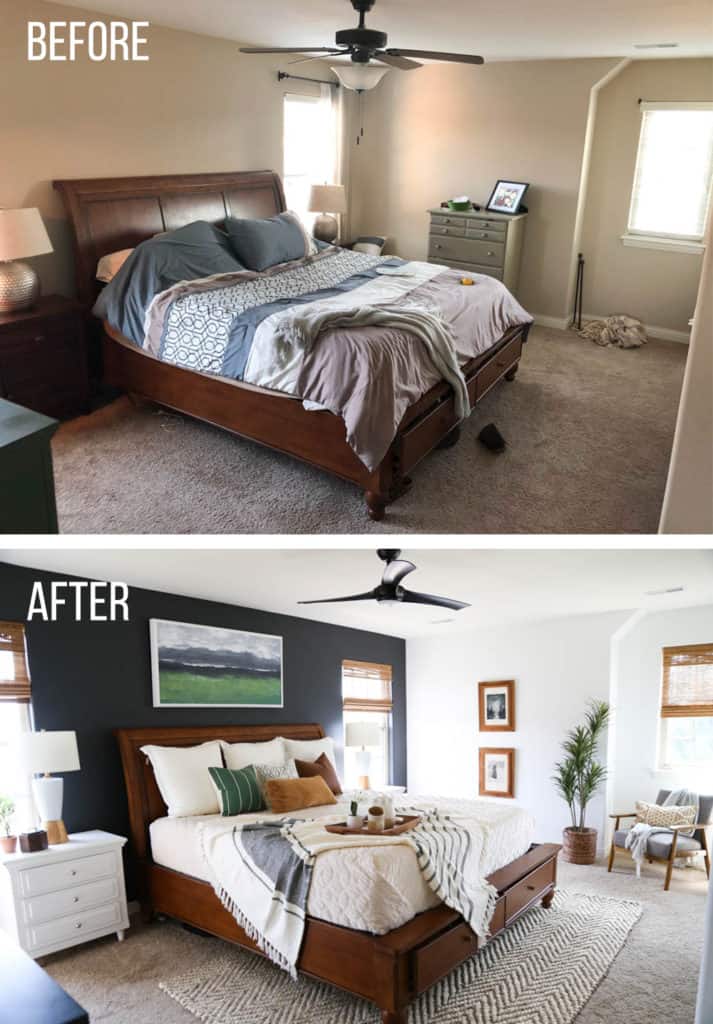
If you spend much time around here, you know I love to update and improve my home. Whether it be my Master Bedroom Makeover (which has gotten over 100K pageviews!) or my Kid’s Bathroom Flip, I have hung my share of pictures, paintings, shelves, and decor.
When I learned this hack on how to hang a picture perfectly level, I have never struggled with the problem since!
How to Hang a Picture Perfectly Level (My favorite hack!)
I wish SO MUCH that I had known about this little life hack on hanging pictures a long time ago. It would have saved me from much frustration, time and unnecessary holes in my walls.
Here’s the trick:
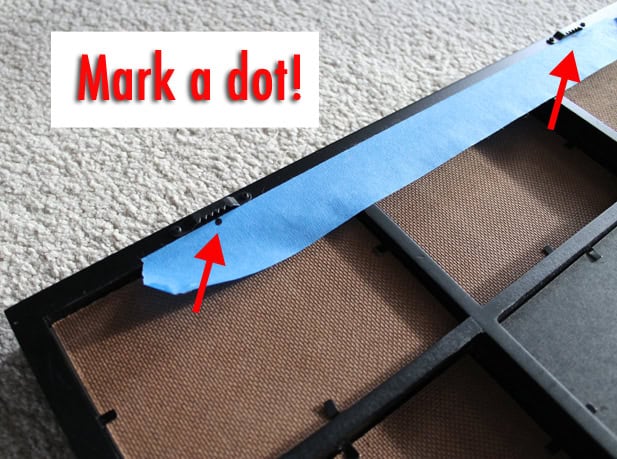
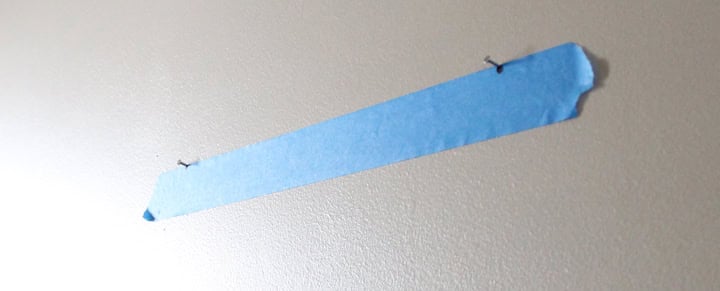
STEP ONE:
For a frame with two brackets on the back, place a piece of painters tape across the back. Mark on the tape exactly where the nails or screws need to go.
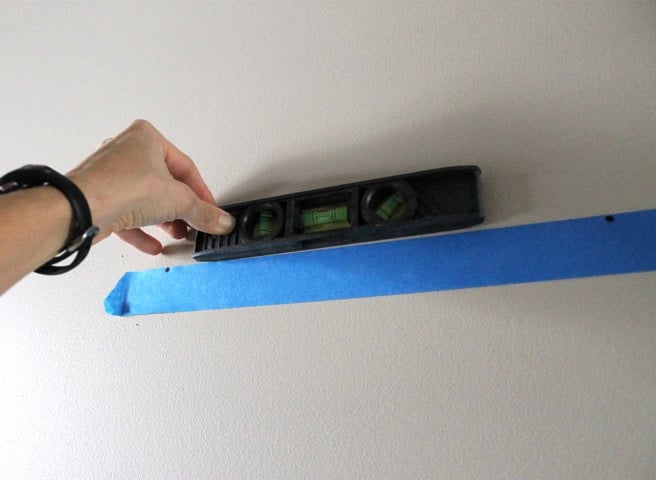
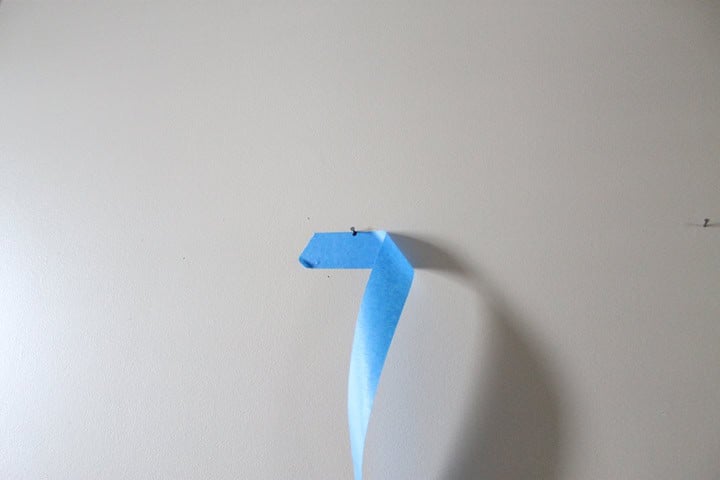
STEP 2:
Take your marked tape and place it on the wall where you want your pictures to hang. Use a level to make sure your tape is perfectly straight.
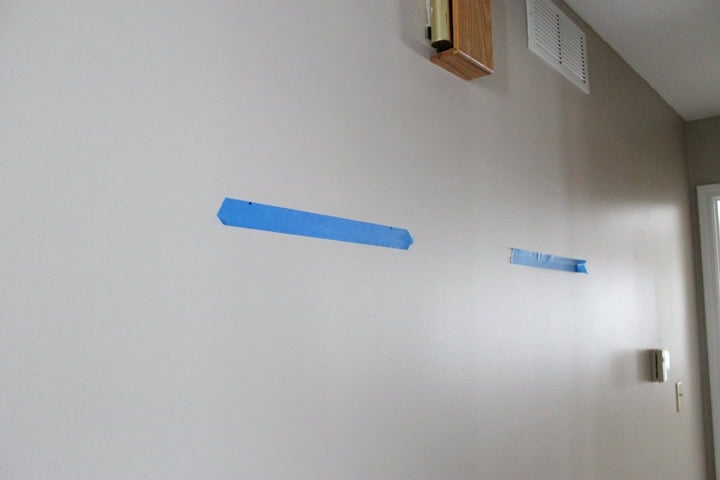
STEP 3:
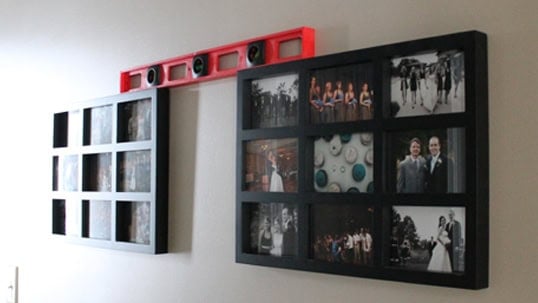
If you want to hang two frames next to each other, do the same thing for the second frame and make sure the strips of tape are level with one another.
STEP 4:
Hammer your nails in on the dots you previously marked.
STEP 5:
Remove your tape and hang your pictures!
Perfectly level on the first try!
I’ve used this method for hanging things SO much and it’s worked every time.
MAKE SURE TO CHECK OUT MY MASTER BEDROOM MAKEOVER, TOO!
That won’t work if you’re not holding it up there straight.
Thank you
You’re welcome!
I love that you talked about using masking tape to align the mirrors so that it doesn’t leave behind marks. My partner and I are trying to redecorate our home this year so that it’s more comfortable and stylish. I want to have some new mirrors in our living room to help the space feel much bigger.
This worked so well! I hung 3 pictures( 6 nails) and only made 6 holes! When i made a template out of the tape I cut it to the size of the frame.I started with my center picture. I used additional tape to keep my line straight and level and then moved the template over on top of my straight line. Hard to explain but makes sense while your doing it. Thanks so much!!!
Great to hear that!
I watched you on Home & Family, your chicken and dumplings looked and sounds amazing to make! I knew I needed to check you ladies out!
Such a great website!
Aww, thanks so much for the encouragement, Peggy! I hope you find our site and cookbooks helpful.
Thank you so much. So many holes…small and medium size already in my walls. Great instructions. Thank you so much.
Awesome, so glad to hear that it worked well!
I wish I saw this earlier before I made two holes in my wall. This is great! Thank you!
After several frustrating attempts at trying to get my picture level I tried this. It worked perfectly and I had NO problems. Thanks so much for sharing this!
Vicky
Awesome!!!
This hack did NOT work 🙁
I did as instructed, put tape level on the back, where the holes were, put tape on wall drilled the holes, anchors in place, screws in the wall, hung the shelf, and a slight tilt. It didn’t make sense until I figured it out, the holes were not the same distance from the top of the shelf! Therefore, the tape should have been placed STICKY SIDE UP!
NOT taped to the wall!! Grr 🙁 did I do something wrong?
Hmmm. Sorry that it didn’t work for you! I’m not sure if I follow what went wrong for you. If the holes are not the same distance on your frame, that would indeed mess things up. Like I said, not sure what went wrong but I have hung TONS of things using this method and it’s been pretty foolproof. So sorry!
This will happen if the location of the nails isn’t exactly symmetrical! I have a fix, which I describe in a separate comment.
OMG, what a wonderful hack!!! This comes at such a perfect time. Our our son recently moved and he and I were just talking about how he wants to hang some pictures as well as his framed hockey jersey. This is going to make hanging them all so much easier.
I nearly threw my hammer across the room trying to hang 9 11×14 landscape photos in a 3×3 pattern. But, instead, I got on the internet and searched for a “hack” (which I should have done before!). I laid out, on the floor, 3 across and 3 down (left side and top) and then, in addition to what is suggested here, used tape along the left side to mark the bracket intervals down so that I could have them equally spaced down as well as across. I marked 3 pieces of tape for across in the same spots, and then placed them at the marks from the piece of tape going down on the wall. Gave me a perfect 3×3! It worked beautifully! Thanks for the hack!
OMG thank you so much what a wonderful hack!
I love this!! It’s SO EASYand work SO WELL!!!?????☺️❤️
Thank you so much for the great idea! Just hung up my pictures and they are all level. 🙂
Cydney
Check out hangomatic website. It’s a picture hanging tool. A measuring tape with a bubble level attached and metal anchors for marking the wall. 3 in 1. Save money in tape a level and all the other tools. Just need 1 hangomatic and you’re done!
Sounds like a cool tool actually. Contact us if you’d be interested in partnering with Thriving Home in some way.
Hi Rachel, I wanted to follow up and see if you received my email a few weeks ago. If live to connect with and discuss how we may be able to partner together.
Karina
This is SUCH a good idea!!