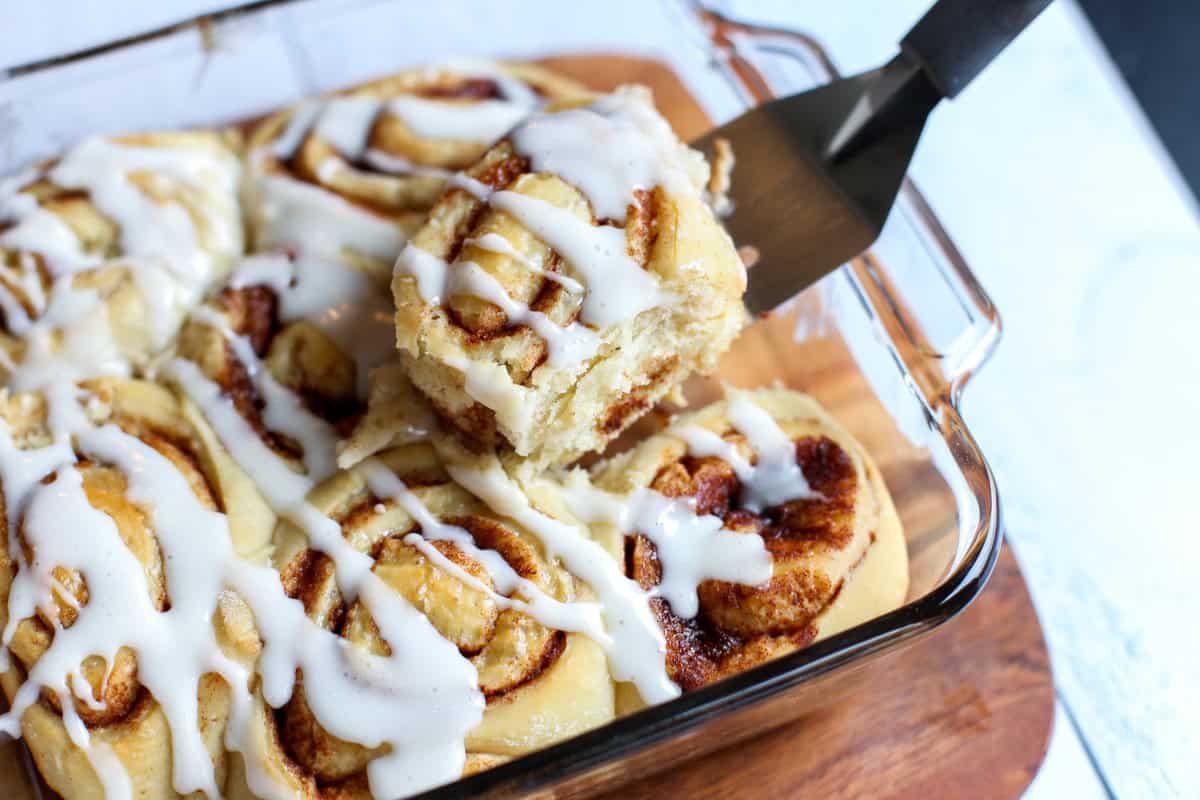
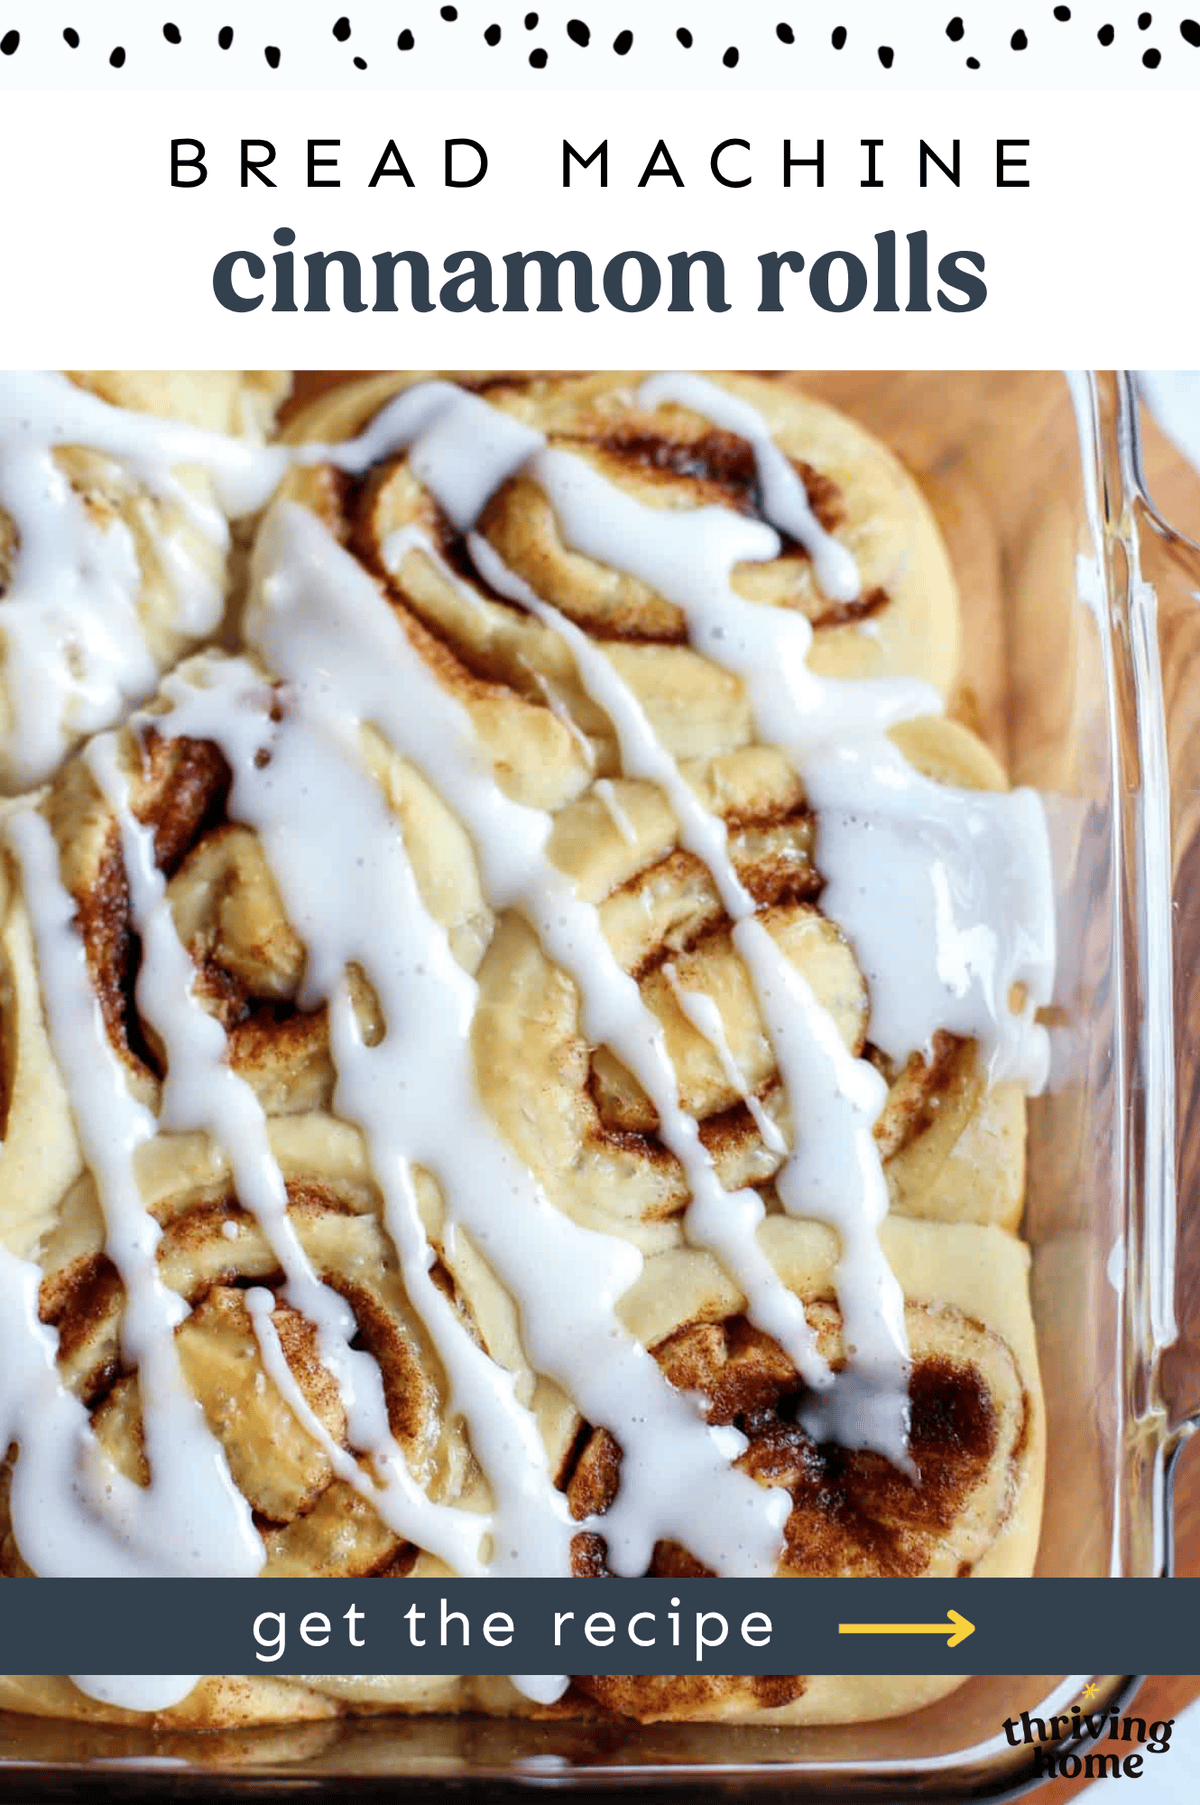
Bread Machine Cinnamon Rolls
I can’t even begin to count the number of times I’ve made these Bread Machine Cinnamon Rolls. My kids cheer when they find out I’m making them. You’ll be the one cheering when you realize how easy it is.
Fear not: Non-bread machine instructions are included or just make our super easy Overnight Cinnamon Roll Casserole instead. Let’s get baking!
Why You’ll Love These Cinnamon Rolls
- The bread machine makes the dough for you. No kneading.
- It yields fluffy results.
- This recipe makes a huge batch of rolls. Great for groups!
- You can make the cinnamon rolls in advance and freeze.
- They are absolutely delicious. We’ve tried all sorts of variations of cinnamon rolls over the years: canned, sourdough, store-bought, farmers market, etc. Despite the hefty competition, this cinnamon roll recipe rises to the top.
Serve it up with our Spinach and Bacon Quiche or along side Crockpot Ham for a delicious meal!
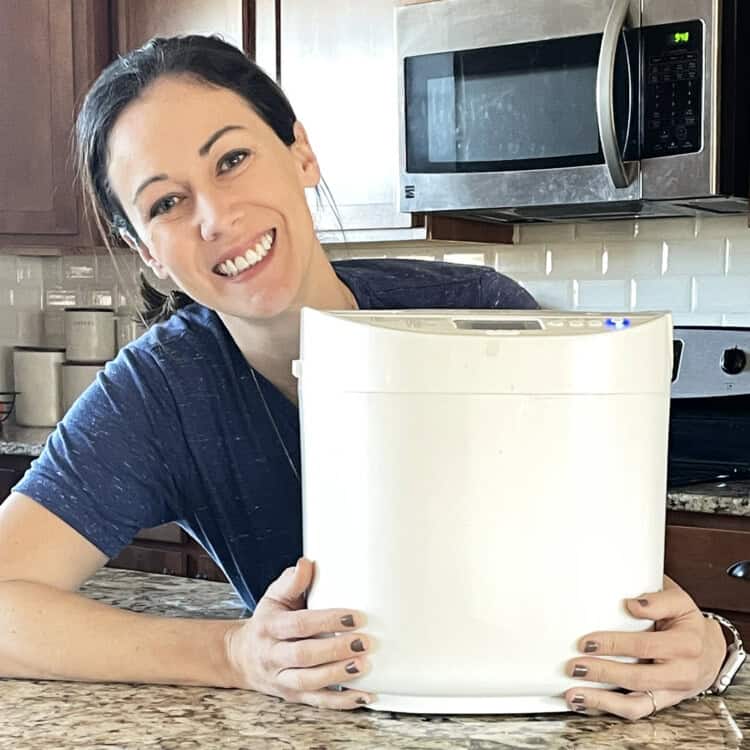
My Favorite Bread Machine
Here is the bread machine I personally use. Many bread machines will have a yeast dispenser at the top. If yours has it, go ahead and use it.
Mine does not but I’ve found my dough turns out fine when I nestle the yeast in right on top of the ingredients.
Ingredients
Here is what you will need to make cinnamon rolls in the bread machine.

Ingredient Notes:
Butter – Needs to be softened. Otherwise the bread machine has a hard time mixing it in.
Flour – Regular all-purpose flour works fine.
Quick Rise Yeast – I have found quick rise yeast yields fluffier results than active dry yeast. But active dry yeast will work as well. Just give the dough more time to rise.
Brown Sugar – I used to use white cane sure but have found I like brown sugar more now. White will work though.
How to Make Bread Machine Cinnamon Rolls
Here’s a brief overview but you’ll find the full printable recipe at the bottom of this post.
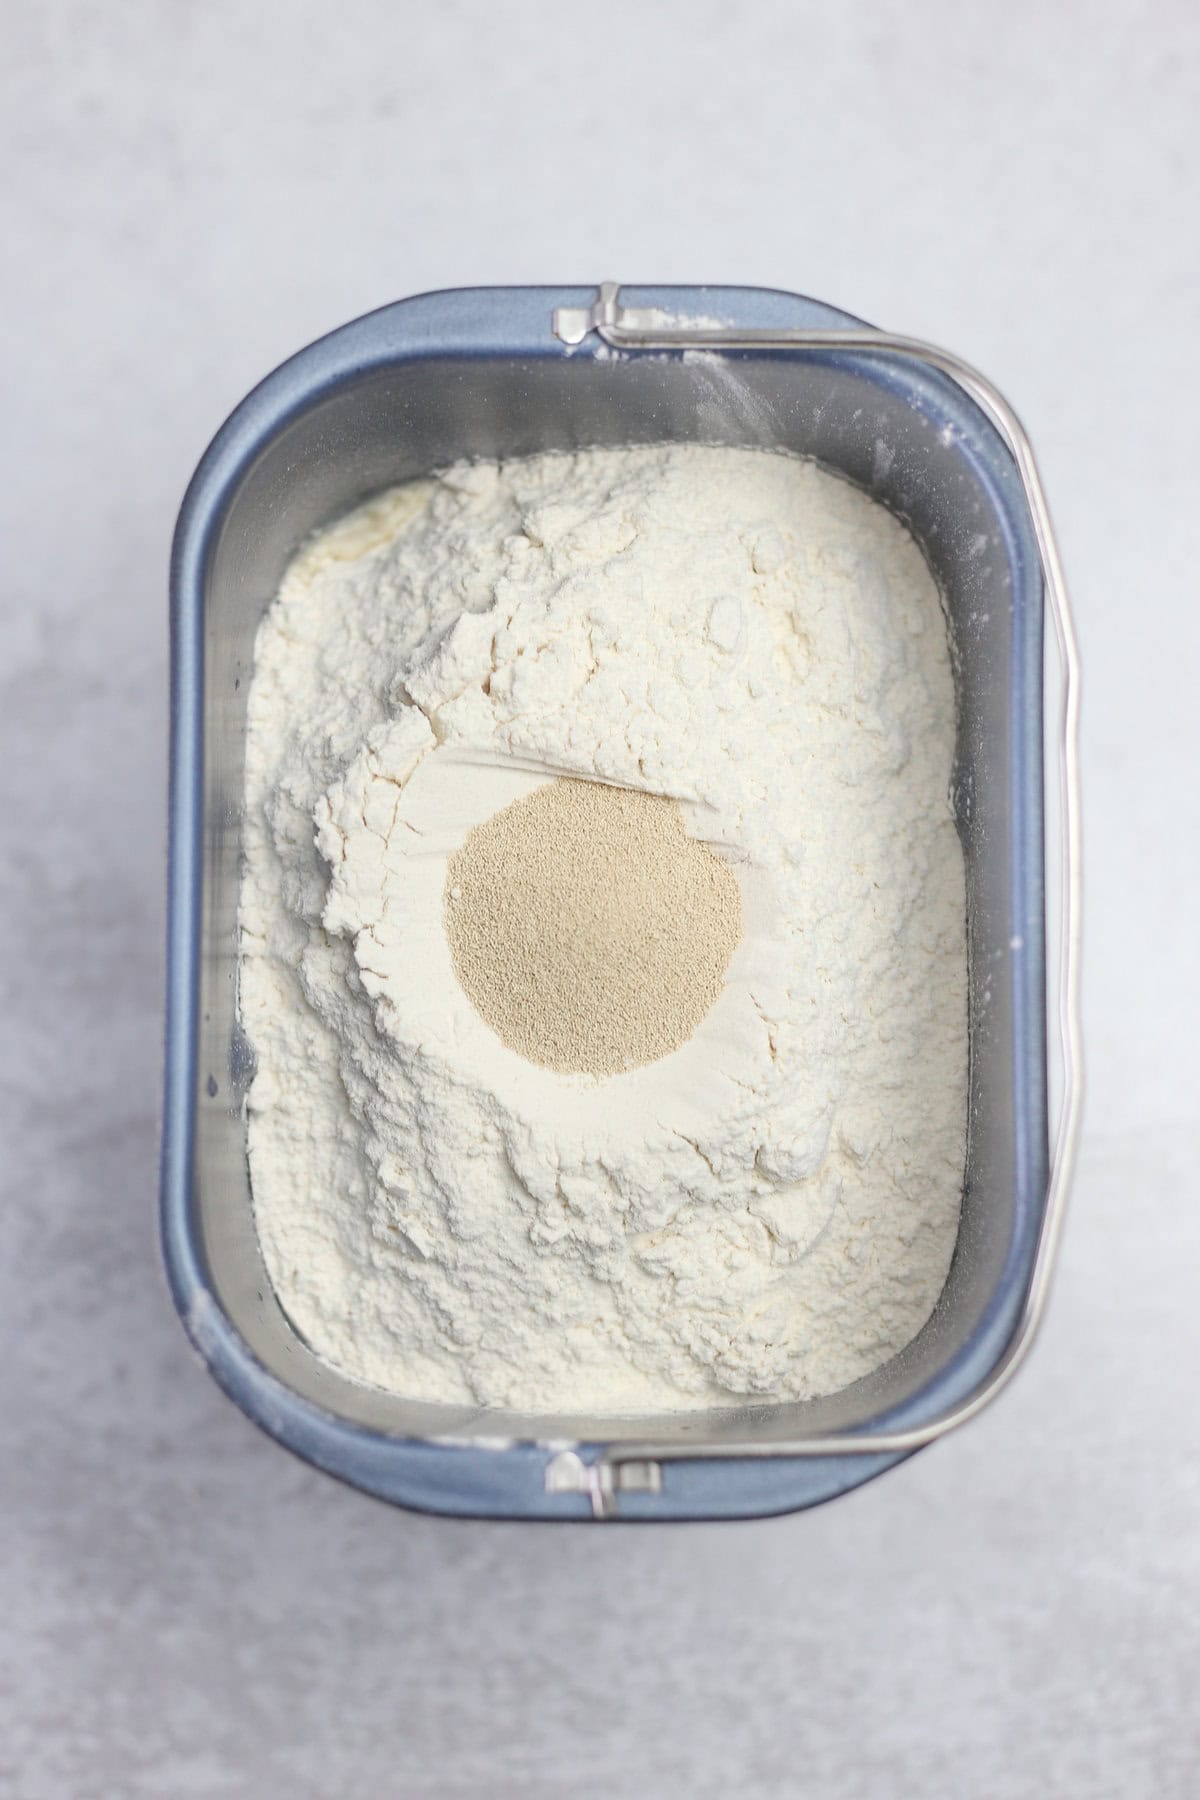
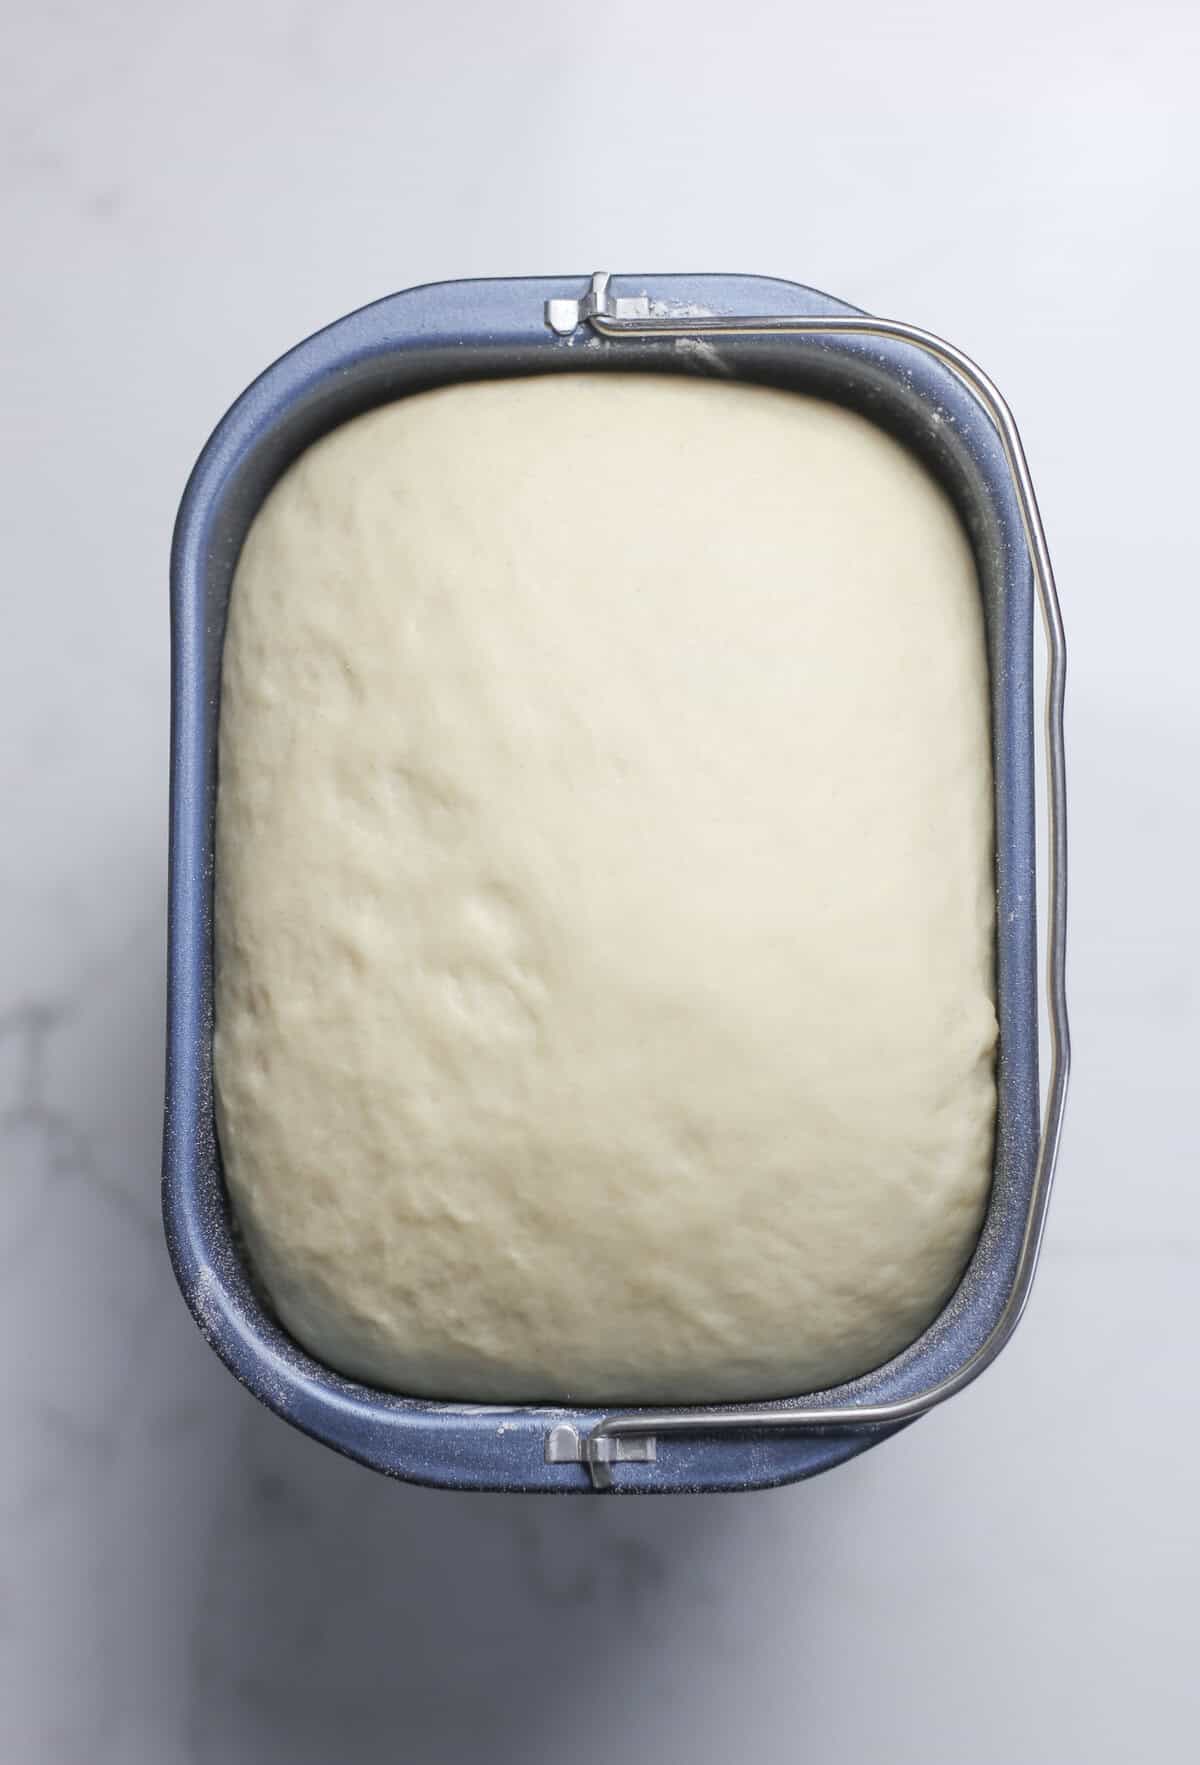
1. Make the Dough
Place the ingredients for the dough in your machine in the order listed in the recipe below. If you don’t have a yeast dispenser, just nestle the yeast on top of the flour. Run your machine on a dough cycle.
The dough setting on bread machines will vary. For reference, my dough cycle takes around 90 minutes. If yours is much different than mine, this recipe may not work as well.
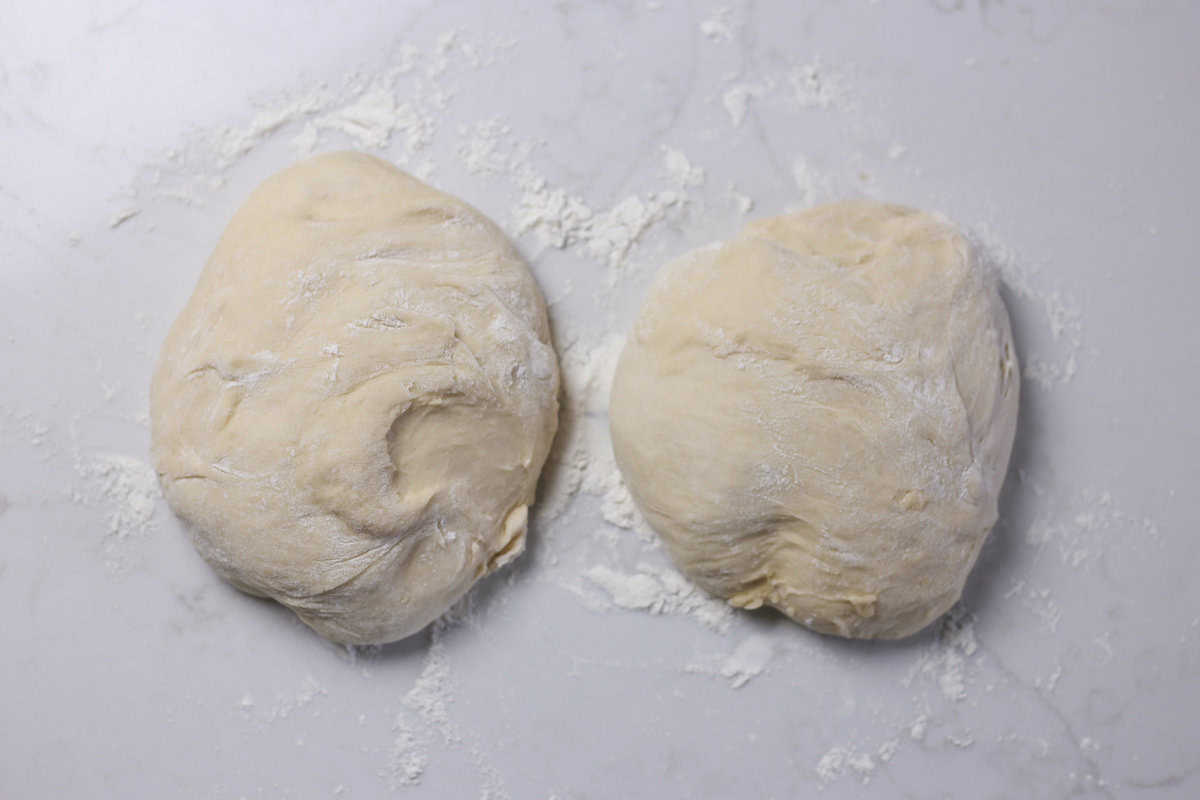
2. Prepare the Dough
Split the dough into two mounds.
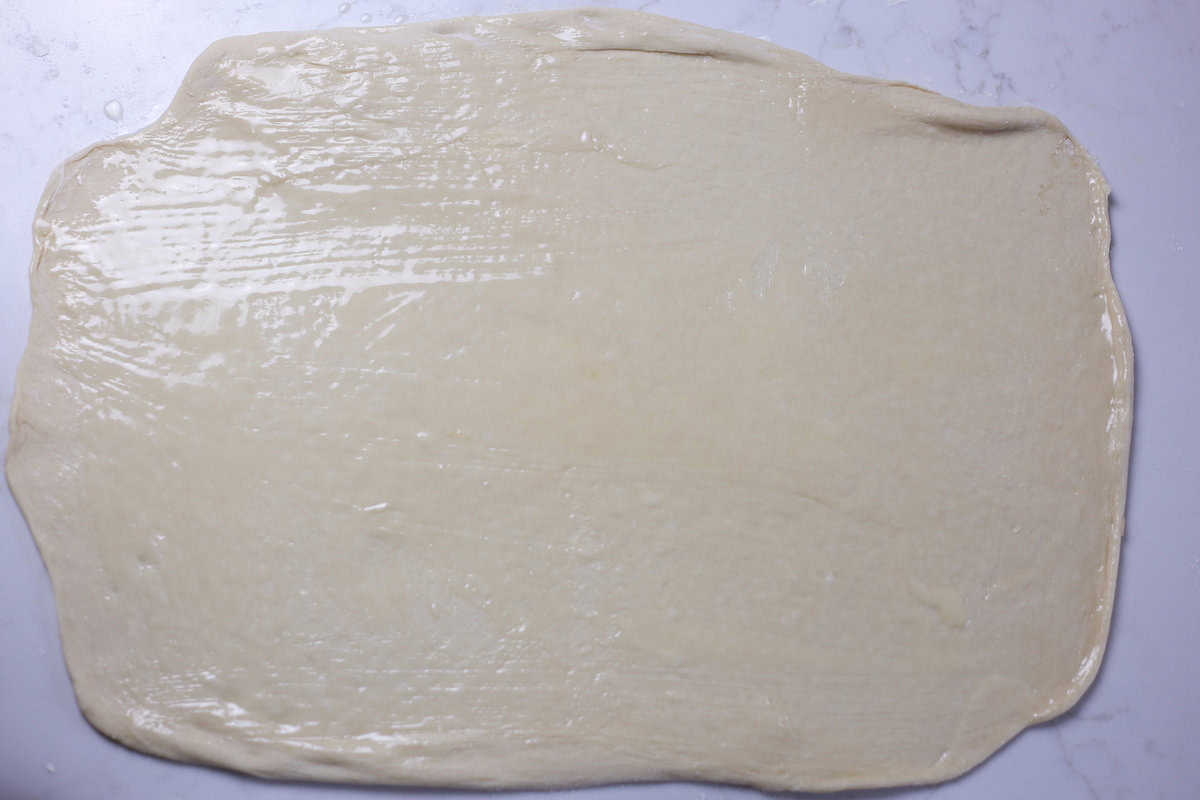
On a floured surface, roll one of the dough mounds into roughly a 18×12-inch sized rectangle. Don’t get too caught up on the size. Aim for a large rectangle.
Using a pastry brush, spread about half of the melted butter over the dough you just rolled out.
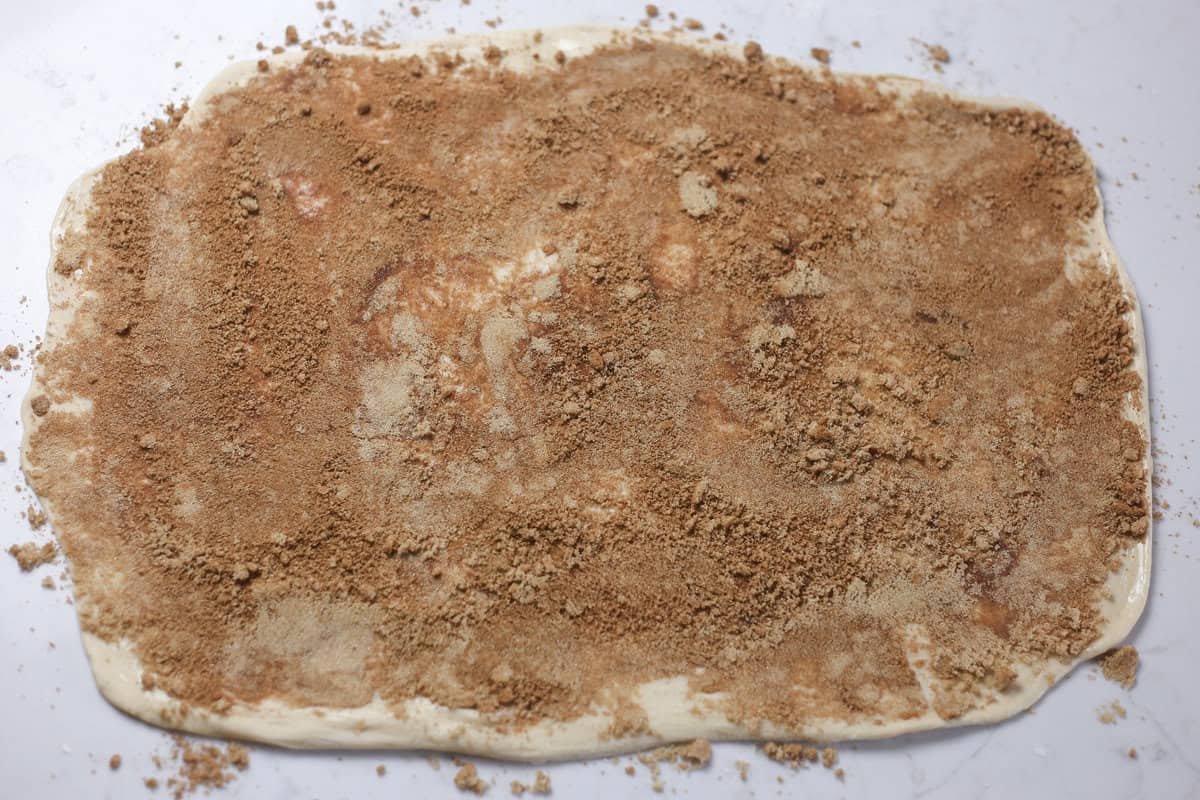
3. Add the Filling
In a small bowl, combine brown sugar and cinnamon. Spread about half of the sugar mixture out over the dough you just rolled out. Just enough to cover the surface.
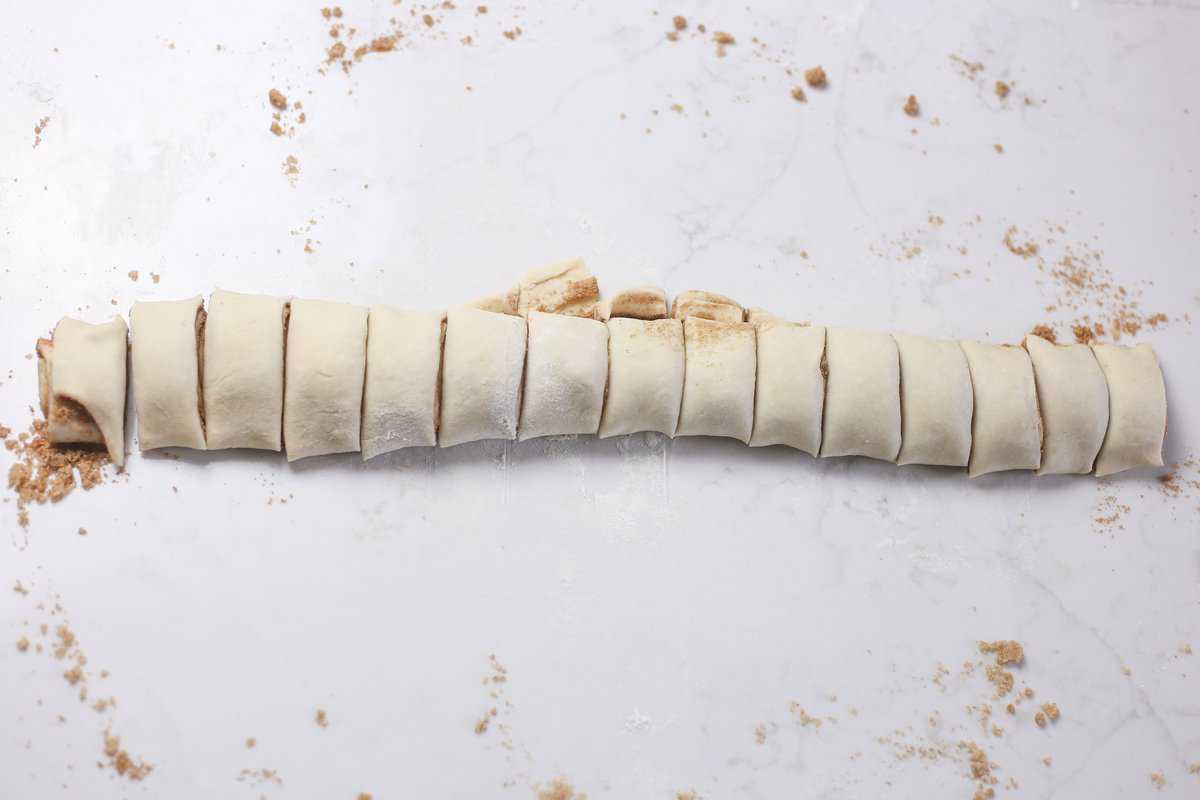
4. Roll and Slice the Dough
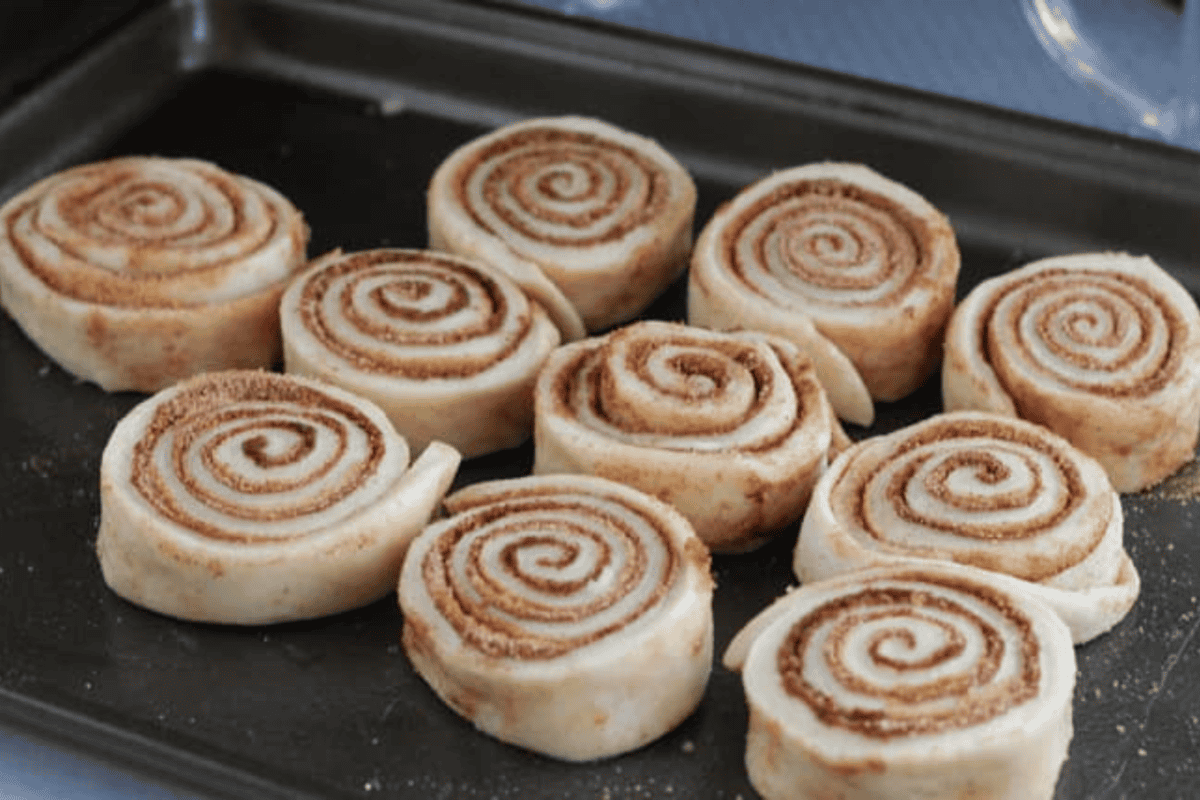
With the long edge in front of you, begin to gently roll the dough. Using a sharp knife, slice the rolled dough into roughly 1-inch pieces.
In a prepared baking sheet (either parchment lined or greased), place the cinnamon rolls close together but not touching. This gives them room to rise.
Repeat the steps above with the second mound of dough.
Optional: If you have extra butter leftover, brush the tops of your dough with it.
5. Let Them Rise
Cover assembled dough with a lightweight hand towel and let rise in a warm environment for another 25-30 minutes. (If it’s cooler weather, I turn on my oven for just a minute or two and then turn it off in order to get it a little warm. I then let it rise in there.)
Don’t worry if they don’t get much bigger. They will still bake fine!
6. Time to Bake
Bake at 350°F for about 17 minutes or until lightly brown on top. Tap the middle of the roll to see if it bounces back. If it does, it’s done!
Note: If baking in a glass dish, they will need additional time. Probably 3-4 minutes more.
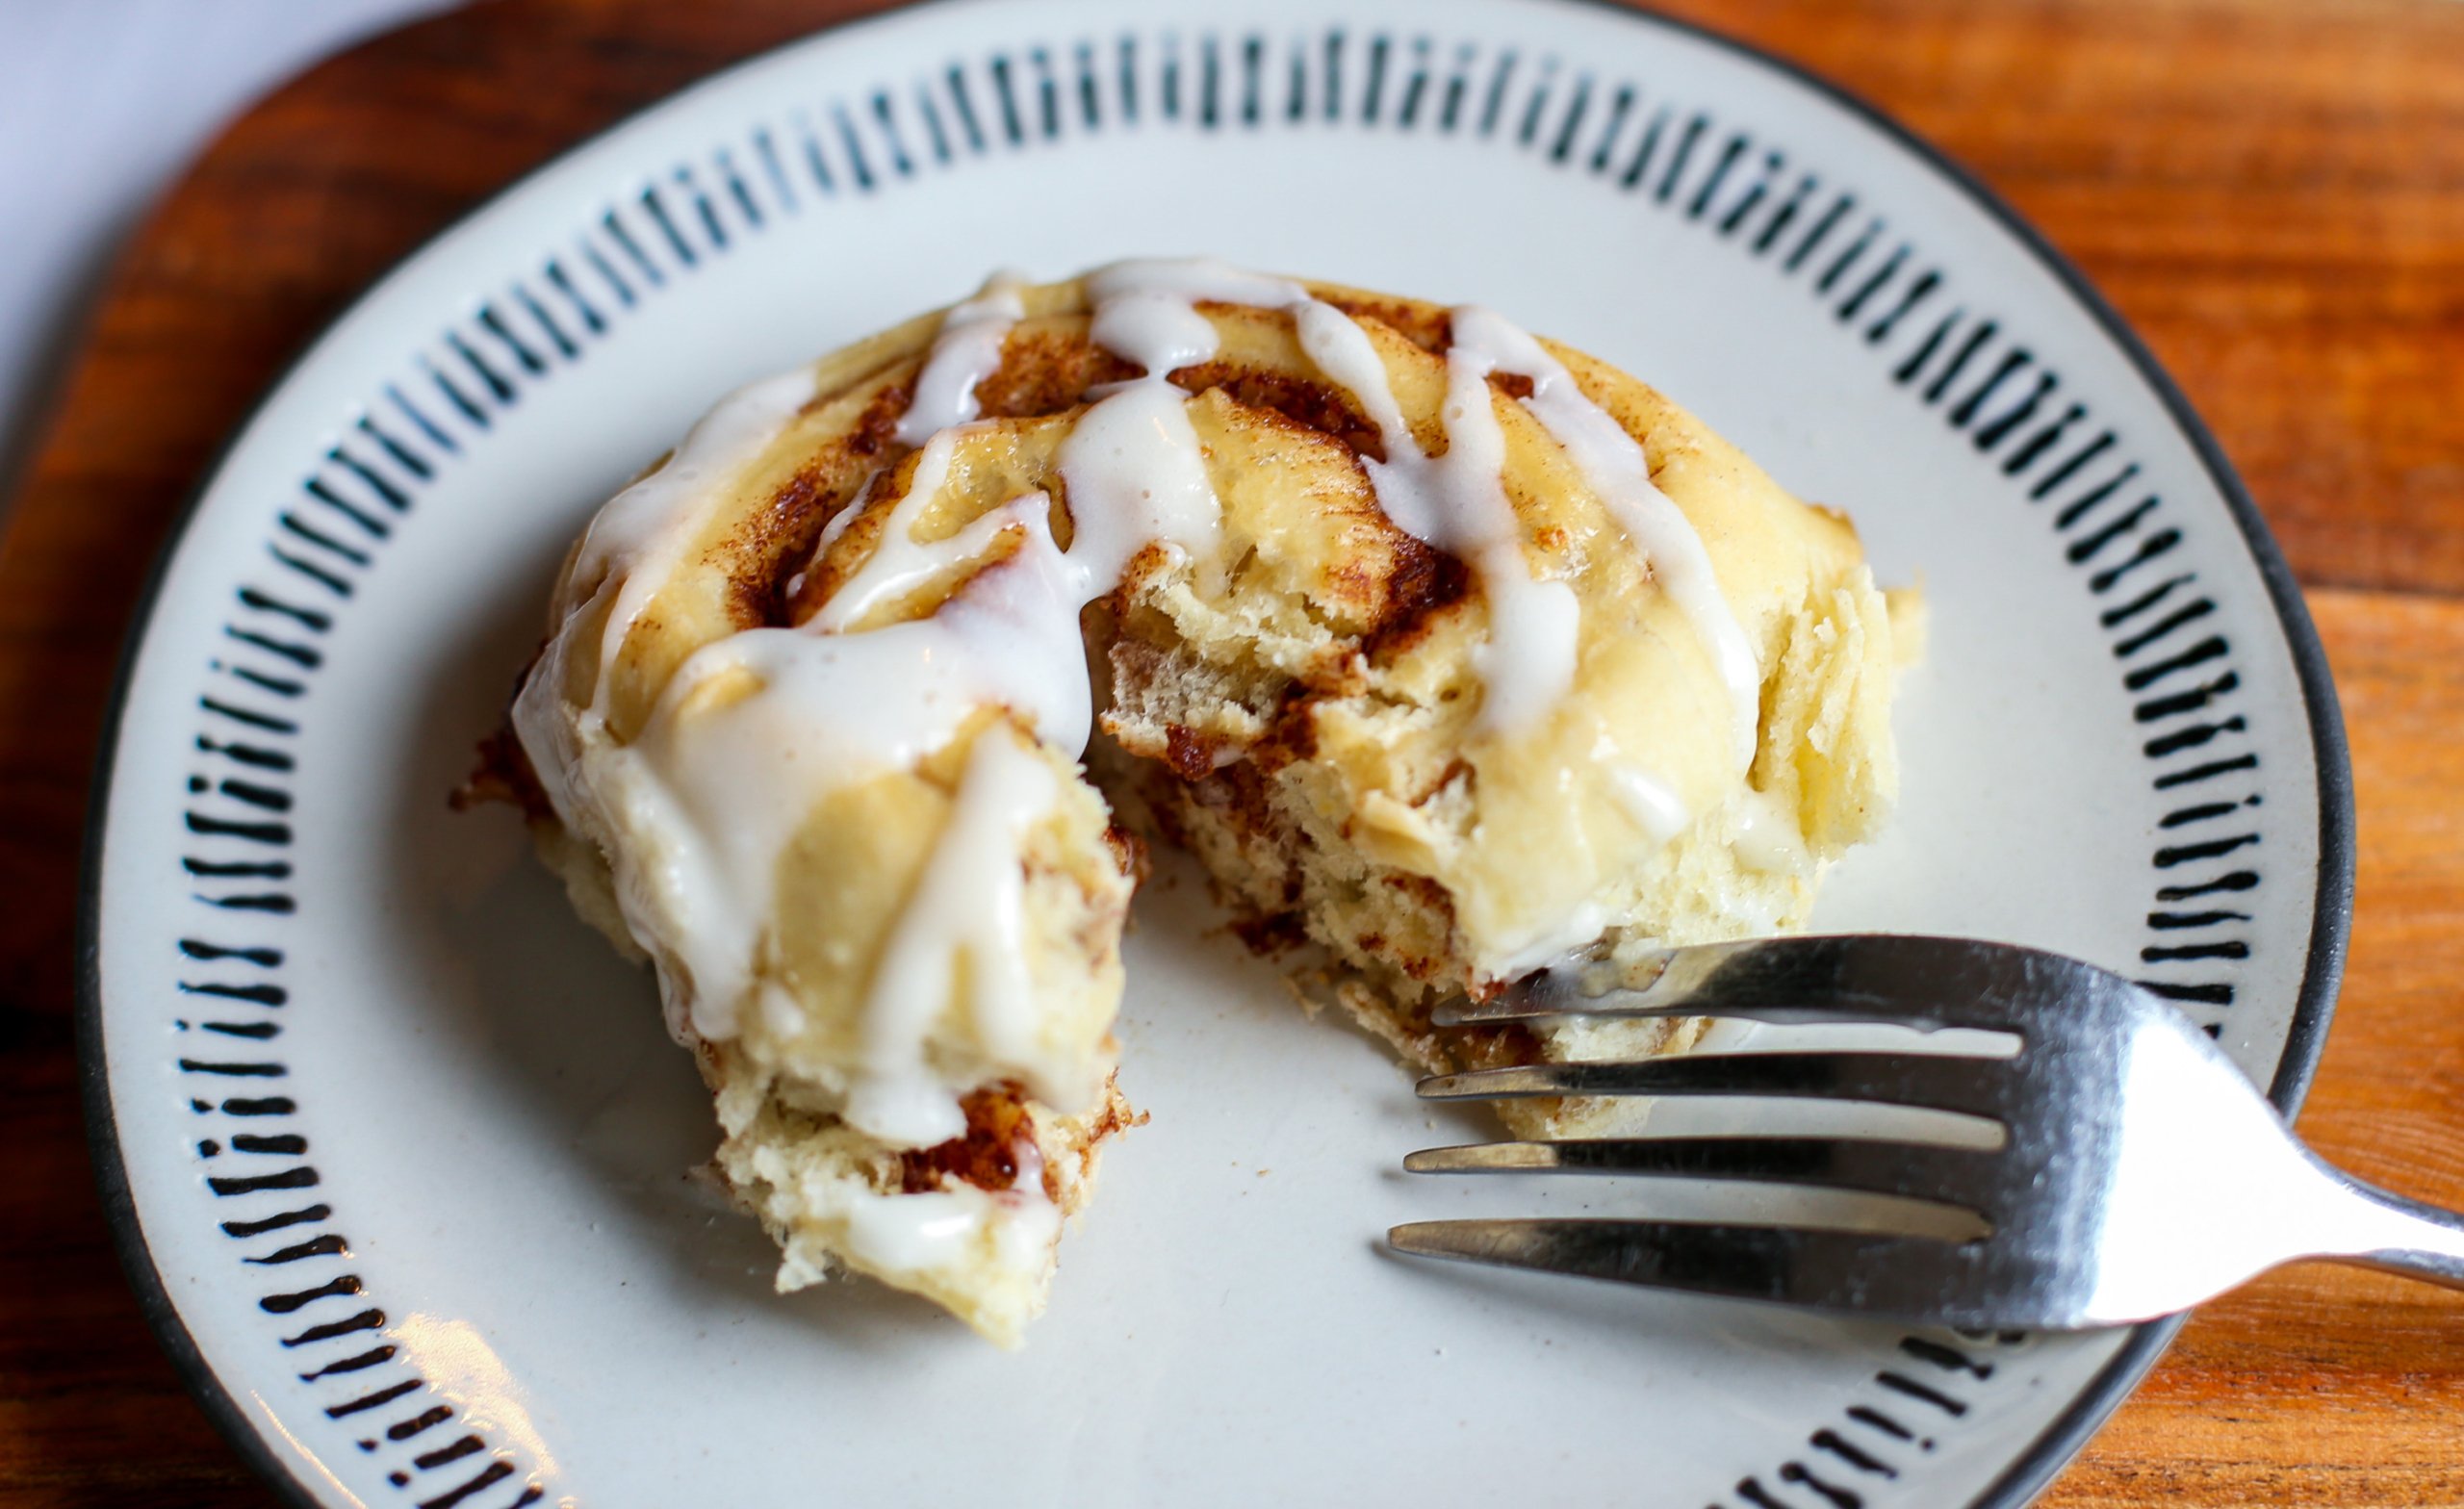
Cinnamon Roll Icing
I keep my icing pretty simple. While there are many variations out there, here is what I use:
- 3-4 cups powdered sugar
- 1/2 teaspoon vanilla
- 4-5 tablespoons whole milk + more if you want it thinner
Mix all of this together until it forms the desired consistency. Drizzle it over the cinnamon rolls.
Freezing Cinnamon Rolls
Prepare Rolls for the Freezer:
- Prepare the dough, roll it out, add the filling, and shape the rolls as usual. Place them in a baking dish or on a baking sheet lined with parchment paper.
- Tightly wrap the rolls and baking dish in plastic wrap, ensuring no air can get in. Then cover with aluminum foil for extra protection.
- Store in the freezer for up to 3 months for the best quality.
Prepare Frozen Rolls for Baking:
- Thaw: Remove the rolls from the freezer and arrange them on a baking sheet. Cover them loosely with plastic wrap or a clean kitchen towel and let them thaw in the refrigerator overnight.
- Proof: After thawing, place the rolls in a warm spot to rise. This can take 1-2 hours depending on the temperature of your kitchen. A good place for proofing is inside an oven turned off but with the light on.
- Bake: Follow directions as instructed.

What to Serve with Cinnamon Rolls

FAQs
I’ve gotten this question a lot so I tested out this exact recipe without using a bread machine. And guess what? It worked!
If you don’t have a bread machine, use a stand mixer to combine all of the dough ingredients. Using a dough hook, let it knead the dough for 7-8 minutes. Transfer the sticky dough to a grease-lined bowl. Cover with a towel and let it rise for about 1-1.5 hours (or until twice its size.) It will be sticky so use lots of flour when rolling it out.
Quick Rise (aka Instant) and active dry yeast are essentially the same ingredients. They are just slightly different in forms and applications.
The main differences between the two are:
Active yeast needs rehydration. Active dry yeast must first be dissolved and rehydrated in warm water. I like to think of it like, “It needs to be activated!”
Quick Rise Yeast needs less time to rise. Since instant yeast has a finer texture than active dry yeast, it’s possible to skip the initial rise time that Active Rise Needs. This is why it works great for bread machines!
I’ve tested both types of yeast with this recipe in my bread machine and the Quick Rise Yeast works much better! Active yeast will work. In fact, I use it in our Ham and Cheese Crescent Roll recipe. It will just need more time and more warmth to rise.
Yes, the rolls are very forgiving and will usually bake just fine even if they didn’t rise much.
I prefer to use metal baking sheets because it gives a nice caramelization on the bottom of the cinnamon rolls. However, a glass baking dish will work as well. You’ll need more than one!
Yes, follow the instructions above about combining two small rolls into 1 large one.
If you want to prepare the rolls ahead of time, assemble them as normal, let them rise, and then refrigerate for 24-48 hours. Make sure to let them come back to room temperature and rise back up again before baking.
How to Video

Bread Machine Cinnamon Rolls
Ingredients
Dough
- 1 1/3 cups water (lukewarm: 110-115°F is perfect)
- 1/2 cup butter (room temperature and cut into small chunks)
- 5 tablespoons sugar
- 1 large egg
- 1 teaspoon salt
- 4 1/2 cups all-purpose flour
- 1 tablespoon quick-rise yeast
Filling
- 1 1/2 cups brown sugar (cane sugar works great too!)
- 2 tablespoons ground cinnamon
- 1/2 cup butter (melted)
Icing
- 3 cups powdered sugar
- 1/2 teaspoon pure vanilla extract
- 4 tablespoons milk (plus more if you like it thinner)
Instructions
- Place the ingredients for the dough in your bread machine in the order listed. If your machine doesn’t have a yeast dispenser, just nestle the yeast in on top of the flour (don’t let it touch the wet ingredients).
- Run your machine on a dough cycle.
- Make the cinnamon sugar filling: Combine brown sugar and cinnamon in a small bowl. Set aside.
- After dough is done, take it out and split the dough into two mounds.
- On a lightly floured surface, roll one mound of your dough out into roughly a 18×12-inch rectangle.
- Spread half of the melted butter over the rolled-out dough.
- Sprinkle about half of the cinnamon sugar over the melted butter making sure to cover as much surface with the filling as you can.
- Starting at one long ends of your rectangle of dough, roll it up.
- Using a sharp knife, slice the dough into roughly 1-inch pieces. The result will be a pinwheel shaped form when turned on its side.
- Place pinwheels on greased metal baking sheet. I like mine slightly touching each other so they all are soft and not too browned on the outside but if you want them not touching, spread them apart on the sheet pan.
- Repeat the steps above with the second mound of dough.
- Cover assembled rolls with a lightweight hand towel and let rise in a warm environment for 25-30 minutes.
- Preheat the oven to 350°F. Bake for 17-20 minutes or until lightly brown on top (add a few extra minutes if using a glass dish). Tap the middle of the roll to see if it bounces back. If it does, it’s probably done!
- Combine ingredients to make icing and spread over warm rolls so it melts into them.
Notes/Tips
- Every bread machine is a bit different. The dough setting on mine is 90 minutes. This is the first rise. The second rise will be after you assemble the rolls.
- I prefer to use a metal baking sheet but if you are using a glass baking dish, allow for a few extra minutes when baking.
- If you don’t have a bread machine, use a stand mixer to combine all of the dough ingredients. Using a dough hook, let it knead the dough for 7-8 minutes. Transfer the sticky dough to a grease-lined bowl. Cover with a towel and let it rise for about 1-1.5 hours (or until twice its size.) It will be sticky so use lots of flour when rolling it out.
- This recipe yields about 25-30 small rolls. Another option is to make large cinnamon rolls. For large rolls, combine two small rolls by unrolling one and attaching it to the end of another. Wrap the dough around itself to form a single large roll.
- Note: This recipe was changed slightly in 2021. I removed 1/4 cup powdered milk from the ingredient list. I made these once when I didn’t have it on hand and couldn’t tell the difference. But it’s up to you if you use it or not! I also opt for quick rise yeast vs. active yeast now.
Nutrition
Could you make these cinnamon rolls and leave them in the fridge to cook the next morning? Or do they need to be cooked right then?
Hi Cara! If you want to prepare the rolls ahead of time, assemble them as normal, let them rise, and then refrigerate for 24-48 hours. Make sure to let them come back to room temperature and rise back up again before baking.
So are we letting these rise twice? Once in the bread maker then again after making the roll. The instructions vs tips make this confusing.
Hi Lora. Yes, there is a rise that happens in the bread maker. AFTER you assemble the cinnamon rolls and slice them and put them in a pan, you let them rise again before baking. Hope that helps.
These turned out amazing! Great recipe!
Thank you for taking the time to leave a review Lori!
I would use more flour next time.
Thanks for sharing your thoughts Anne!
Great recipe and details but WAY more sugar than is needed – I love sugar and they were even too sweet for me. Suggest cutting the filling sugar down to 1/4 cup and keeping the icing sweet.
Hi Shana. Thanks for the suggestion and review. I believe there are others who’ve mentioned they use less sugar as well. It is amazing how different all of our paletes are!
I followed the recipe exactly, and my dough setting is only 45 minutes. Maybe that’s why. But my dough was way to wet and sticky. I added more flour and was able to roll it out and complete the recipe. They still tasted good.
Glad they tasted good Tiffany. Thanks for the feedback.
Question! Every time I make cinnamon rolls, I never know what size of baking dish to use. I have 8” pie rounds, but I usually use a glass 9×13. This is my first time with this recipe. What do you recommend? My other recipe I use, every time the rolls rise right out of a 9×13 pan. Maybe this is a smaller recipe?
I am also making these vegan, subbing butter with dairy free country crock and chia egg, instead of a real egg. I’ll let you know how they turn out!
I actually use a greased baking sheet most of the time! A 9×12 dish would be too small so if you want to use glass baking dishes, you will need 2 of them. Let us know how those substitutions turn out!
This one of my son’s very favorite foods so he’s become somewhat of a critic.Once I made this recipe he told me to keep making this one only. And because it makes 2 pans of them my husband manages to get some before they’re all gone. Our new go to recipe for cinnamon buns!
So glad you found a winner for the critic Gina… and that others get to enjoy it too. 😉 Thanks for leaving a review.
So easy! Big hit!
Thanks Kirk!
Nice and fluffy, I wish I would have seen that it made 22 before I started the dough filled my bread machine to the window. Really made 12 large rolls, 12 delicious rolls. I’ll make a half recipe next time.
Thanks for noting this for others Adam. Glad they turned out well for you!
Best way to reheat?
I’d say 30 seconds in the microwave for one roll is the best way. 🙂
The fluffiest rolls I have ever made, the hubby said they were the best. Will definitely be making these again..
Hi Nora! Love to hear this. Thanks for leaving a review!
Oh yes, an easy and rich cinnamon roll recipe…makes a generous batch so you can freeze a few or give to friends.
Thanks Deborah!
The best cinnamon roll recipe! My husband and kids love them and request them frequently! Easy to make and more delicious than Cinnabon!
Hi Cynthia! Thank you so much for taking the time to leave a review. What a treat to be thought of as better than a business that mostly just does cinnamon rolls! 🙂
This is my second time making this recipe it is absolutely wonderful. My husband took some to work with him the first batch and he said everyone of the workers were asking for me to make some more. This time I am making a double batch of them. I have made lots of cinnamon rolls in the past, this is the first recipe I’ve used making them with my bread machine. I bet they will all be gone tomorrow evening when my husband comes home from work. Thanks for a great easy and delicious recipe!
Wow Angela! High praise for sure. Thank you so much for taking the time to leave a review.
My family loved them!
Wonderful, so glad to hear it Dolores!
The texture is great; I’ve never had sweet dough come out as nicely as this. I think next time I would cut them into 2 inch slices to create a larger cinnamon roll. They rose but tend to flatten somewhat with baking.
Who doesn’t love large cinnamon rolls? 🙂 So glad you found this recipe. Thank you for leaving a review Karen.