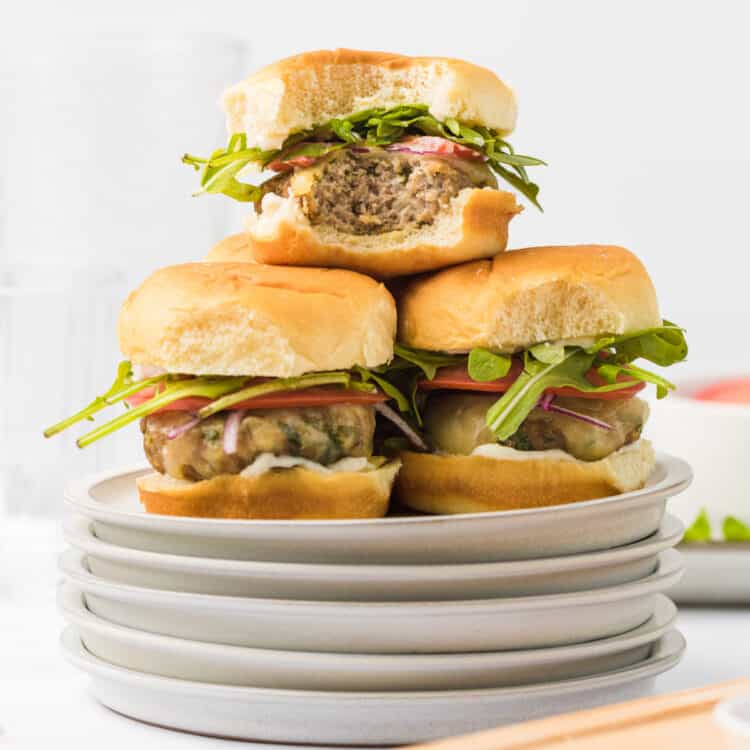
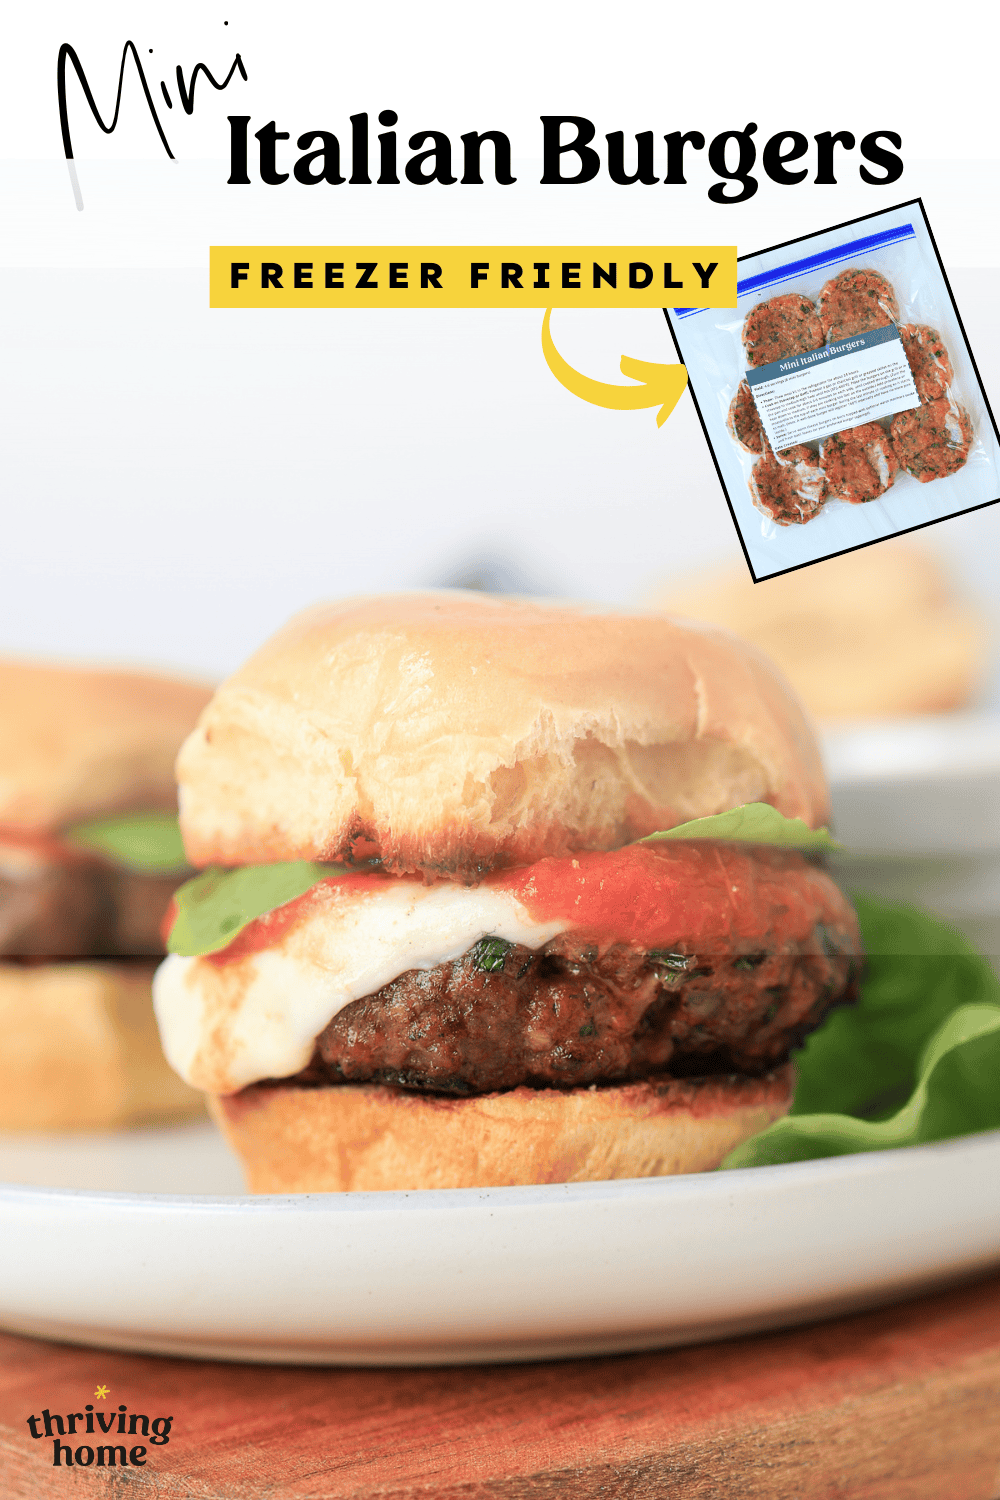
Mini Italian Burgers
Moist and packed with Italian flavor, these Mini Italian Burgers will impress anyone from guests to the youngest eaters in your house. Even better, they are freezer-friendly! You’ll want to double the batch every time you make these mini burgers.
Here are a few things I think you’ll love about this recipe:
- Fun, flavor-filled twist on the standard burger – Fresh herbs, Parmesan cheese, pantry seasonings, and even a little tomato paste make these sliders moist and packed with Italian flavor.
- Freezer-friendly – If you’re making one batch, I’d recommend doubling it. For very little extra work, you can freeze another one to have on hand later using our instructions.
- Versatile – You can grill these or cook in a skillet.

Testing Notes & Tips From Rachel’s Kitchen
- Consider Using a Food Scale: While you certainly don’t need one, I find that having a food scale helps me make uniformly sized burgers. I measure out about 3.5 ounces per slider. (This is the food scale I own and recommend.)
- Forming Burgers: When forming the burger patties, don’t compress them too much. Lightly form them into discs and then press a divot into the middle (to prevent them from puffing up in the middle).
- Patty Size: I’ll have you make bigger patties than you might expect for mini burgers, but trust me, they’ll end up being the perfect slider size after being cooked.
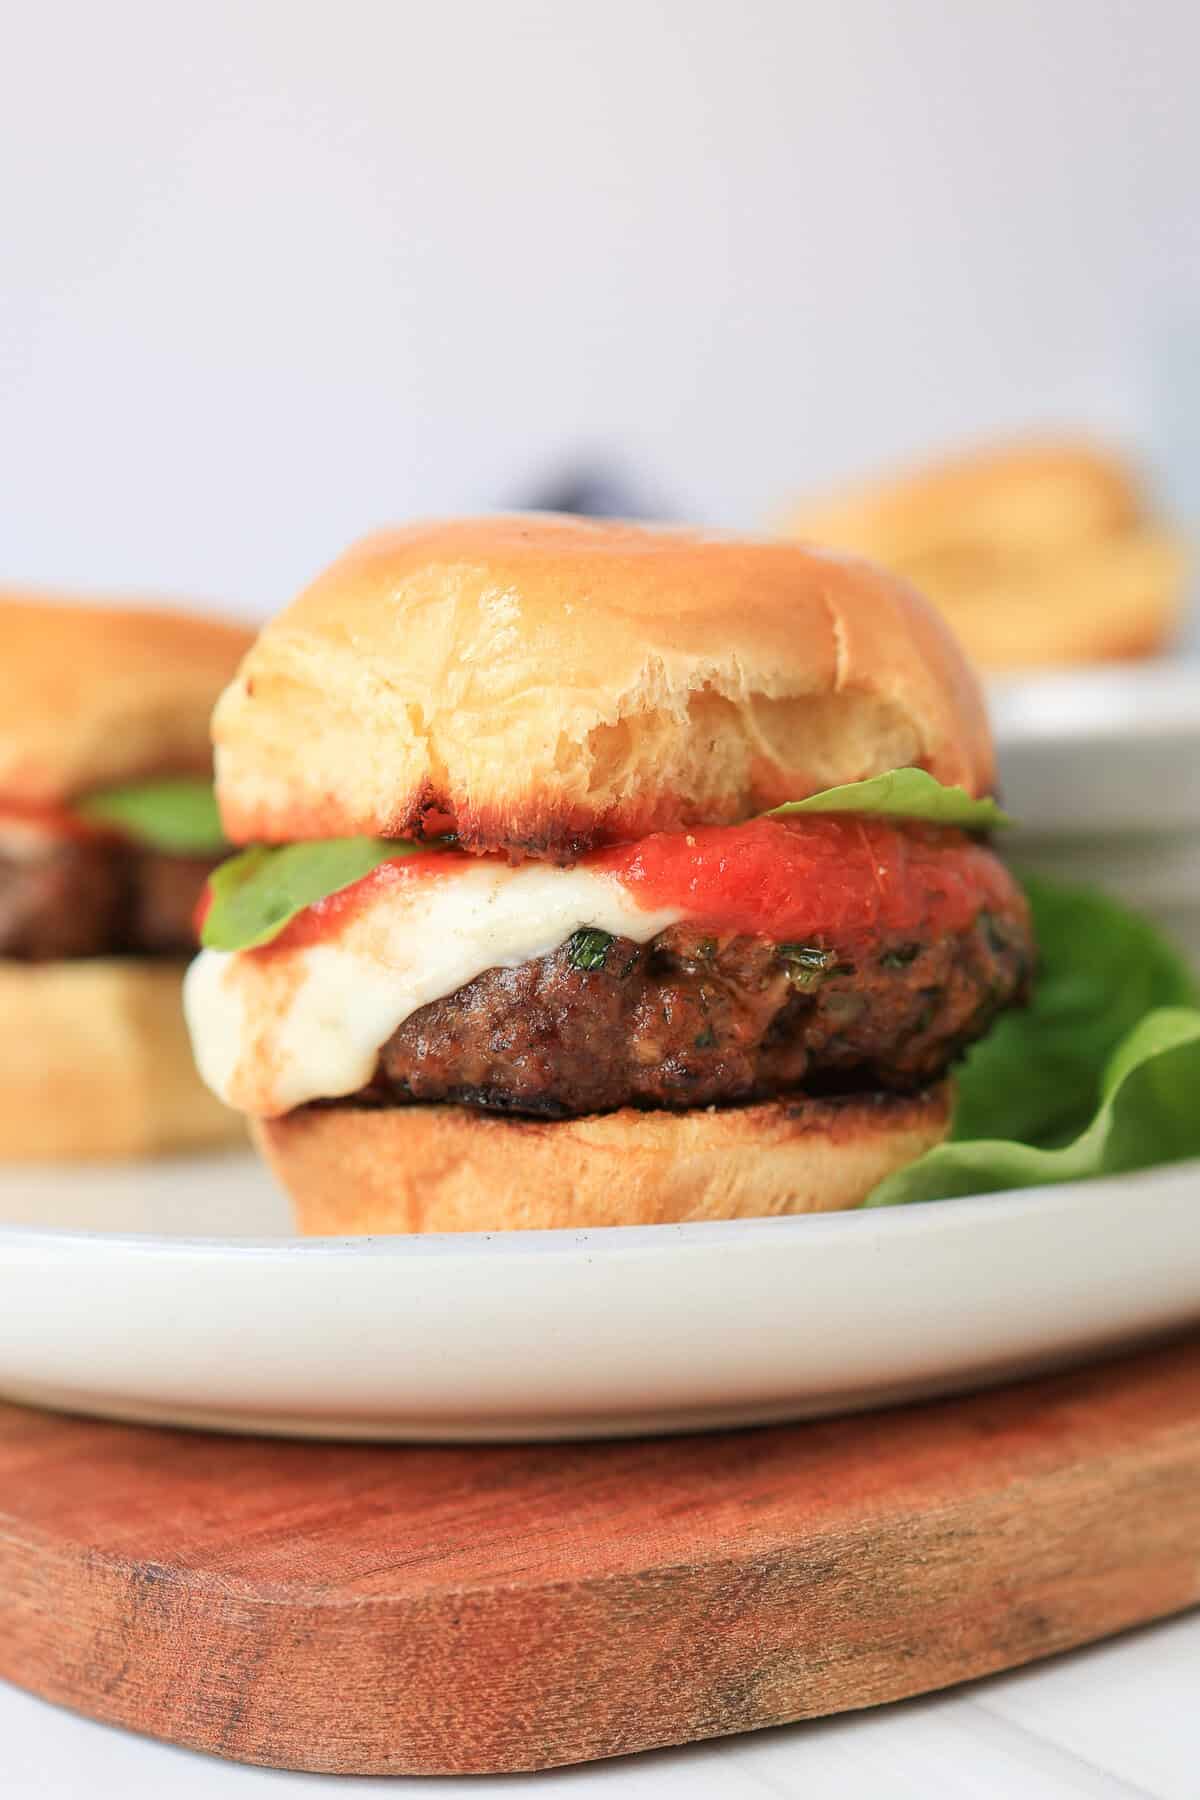
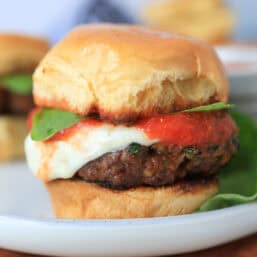
- Toppings: While you can certainly use your favorite standard burger condiments, I’d recommend using fresh mozzarella slices, warm marinara, and basil leaves for the full Italian taste experience!
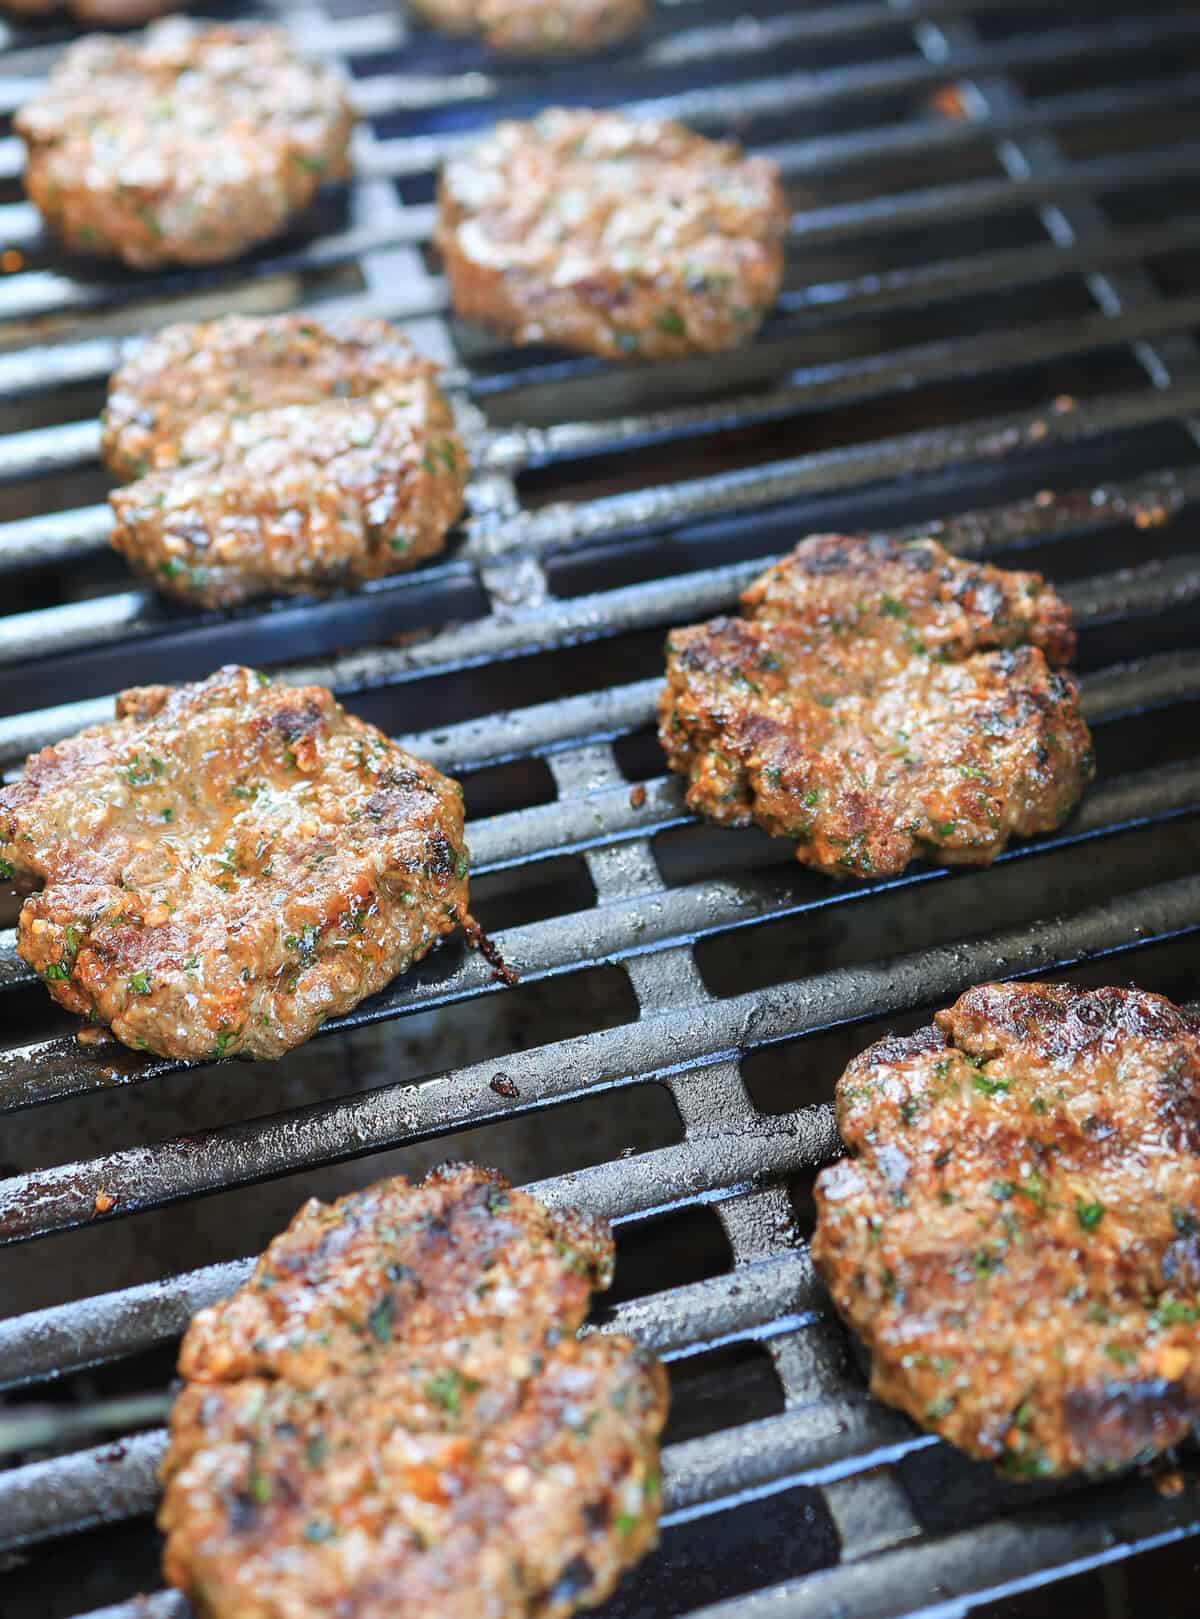
- Grill Tips: Make sure the grates are very clean and hot before placing the burgers on the grill. Use a water spray bottle for any flare-ups. Be sure to add the buns to the grill too! I love to toast the insides for about 1-2 minutes.
- Melting Cheese: The mozzarella cheese can take a while to melt, so I like to turn off the heat at the end, close the lid, and leave them sitting there a few minutes while I finish up the rest of my meal.
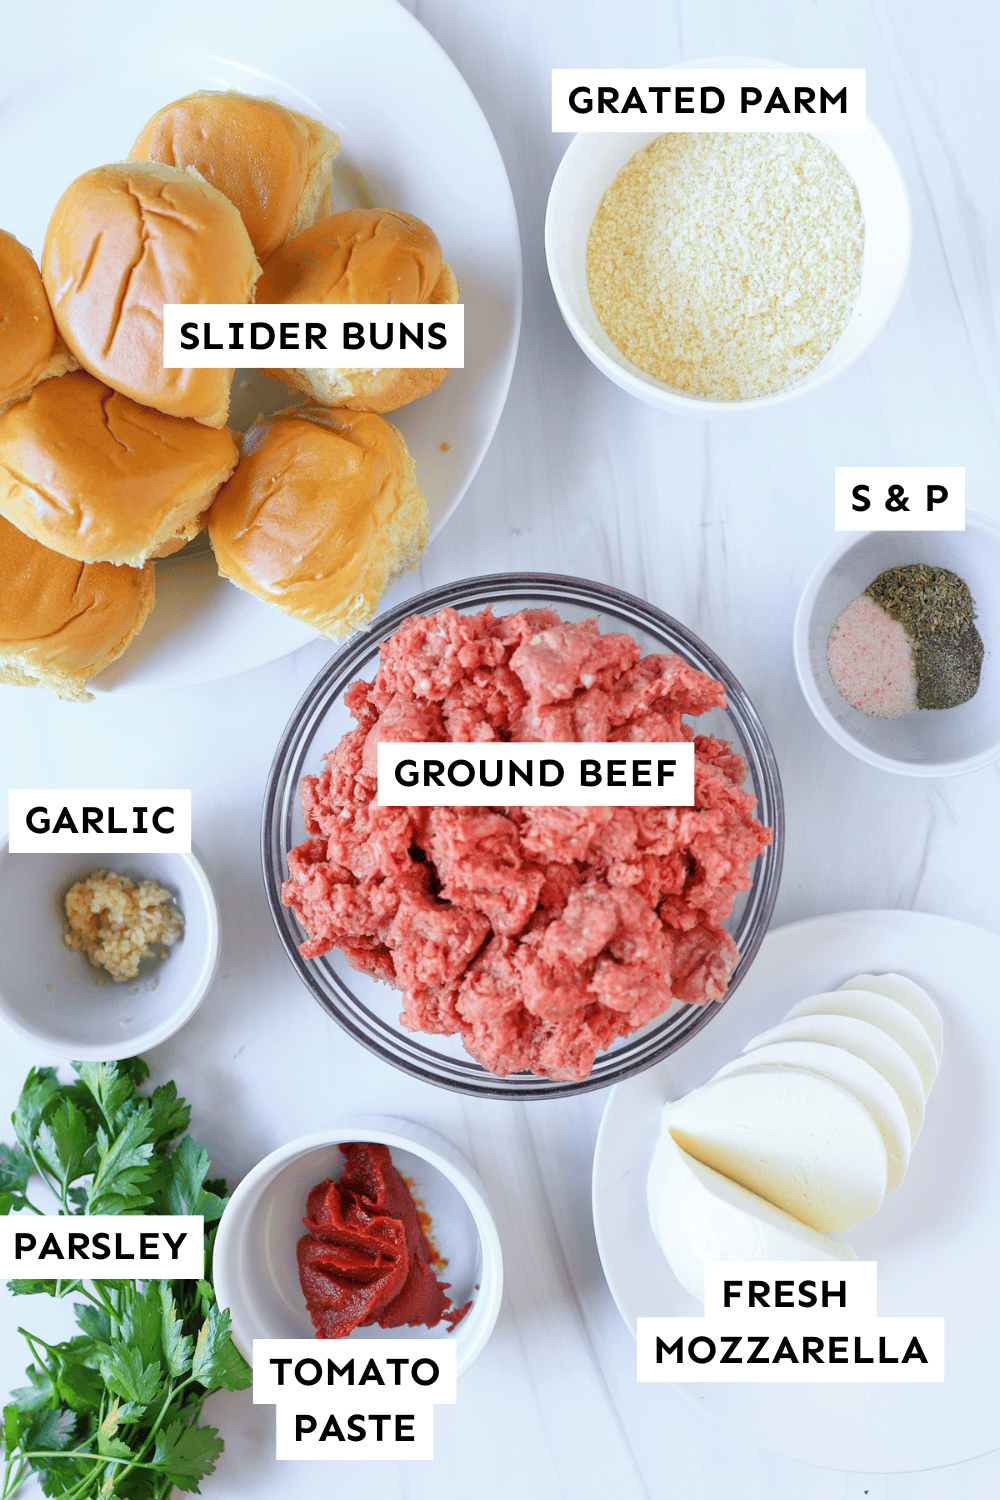
Ingredients Needed
It only takes a few ingredients to transform boring, bland ground beef. Just one of the many reasons I love burgers! Here’s what you’ll need on hand.
Ingredient Notes:
- Ground Beef – I know all the chefs will say to use 80/20 ground beef for burgers, but I hate all the grease from it. So I prefer leaner grass-fed ground beef (here’s where I get mine). But, buy whatever you prefer.
- Fresh Herbs – I used fresh parsley, but you can certainly use fresh basil instead.
- Slider Buns – We love these on mini brioche buns. You can also just look for slider buns in the bread aisle or sometimes I’ve found mini ciabatta rolls to serve them on. Or try these amazing Bread Machine Hamburger Buns!
- Cheese – These are delicious with fresh slices of mozzarella cheese (1 mozzarella ball is the perfect size for 8 sliders). Provolone is also a great cheese to serve on these.
- Optional Toppings: I highly suggest serving these with warm marinara sauce and fresh basil leaves on top.
How to Make Mini Italian Burgers
Here’s a quick overview, but you’ll find the full printable recipe at the bottom of this post.

Serve
Serve warm cheese burgers on buns with preferred toppings. I recommend warm marinara sauce and fresh basil leaves.

Make it a Meal
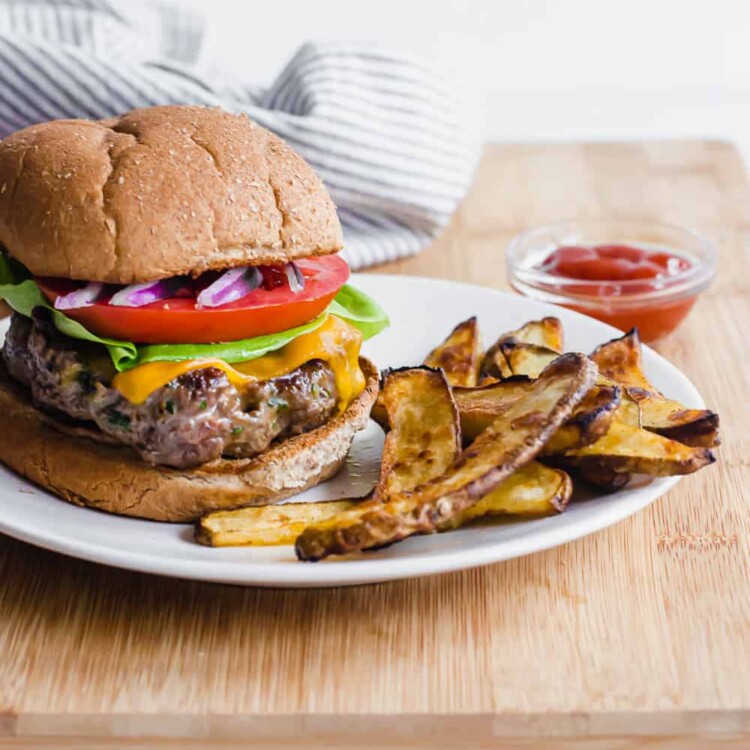
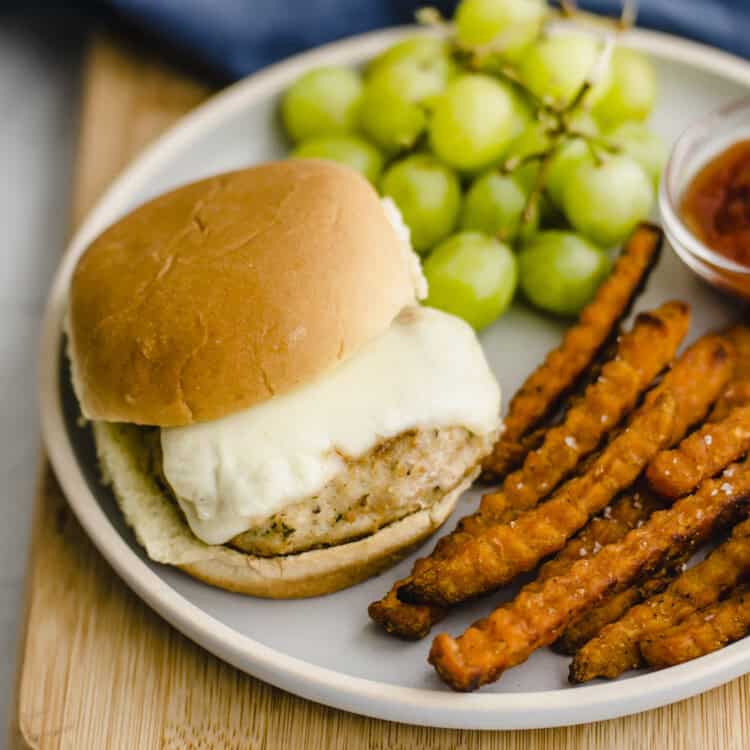
These Mini Italian Burgers play nice with all sorts of side dishes. If you need some ideas, here are some to get you started.
How to Freeze Burgers
You can prep these mini burger patties ahead of time and store them in the fridge for 2-3 days or in the freezer for up to 6 months if you package them correctly. That’s the case for almost all freezer meals!
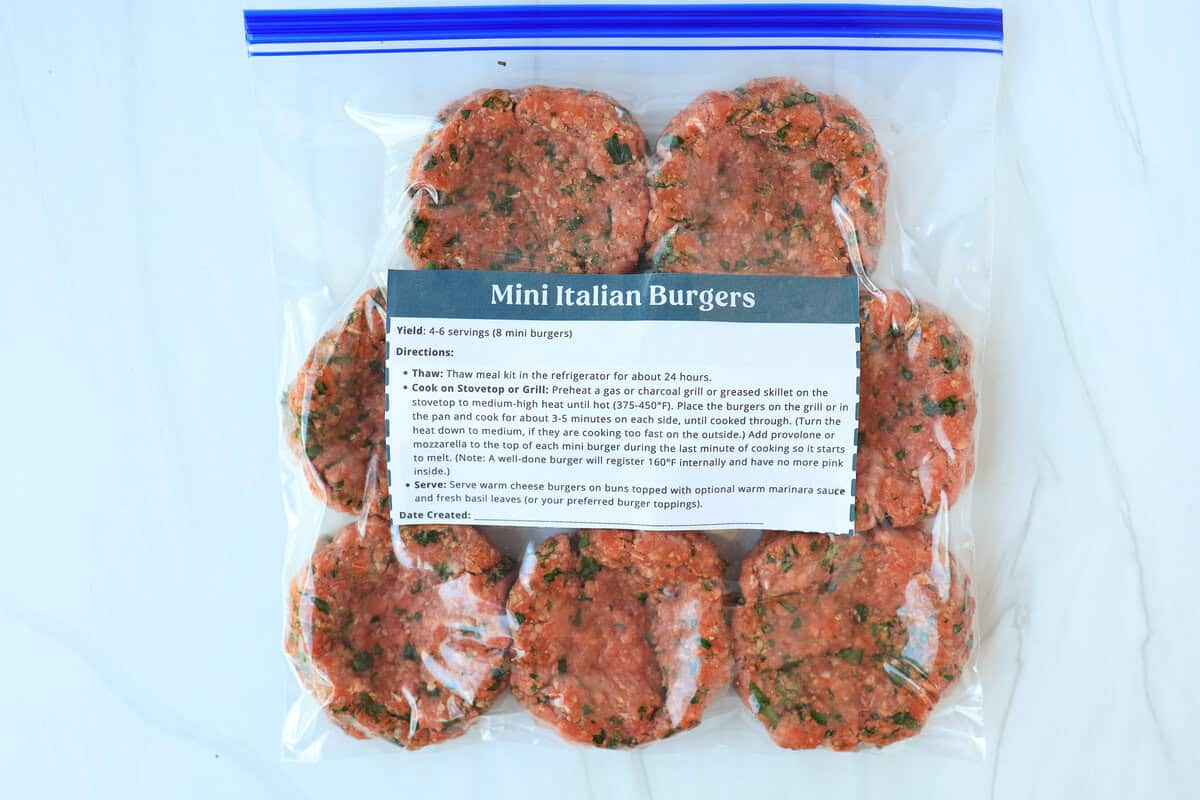
When I make burgers, I always double the batch and freeze one for later (before cooking them). It’s such a great use of my time in the kitchen, especially when I know my family loves these so much.
Here’s how to freeze and thaw them:
Freeze for Later
Package uncooked burgers in single layers between pieces of parchment or waxed paper in a freezer bag/container. You can freeze a package of slider buns along with the burgers to create a kit. Seal and freeze.
Prepare From Frozen
Thaw completely in the refrigerator, about 24 hours. Set on counter and bring up to room temperature for about 20-30 minutes. Cook according to instructions.
FAQs
Use a meat thermometer to determine when your burger is done to your liking. It’s safest to cook until well-done to kill any bacteria. A well-done burger is no longer pink inside and has an internal temperature of 160°F.
Sure! Just cook them longer until they reach an internal temperature of 160°F.
We have a great idea for you! Chop them up into small pieces and use in our Cheeseburger Bowls another night soon. So yummy!
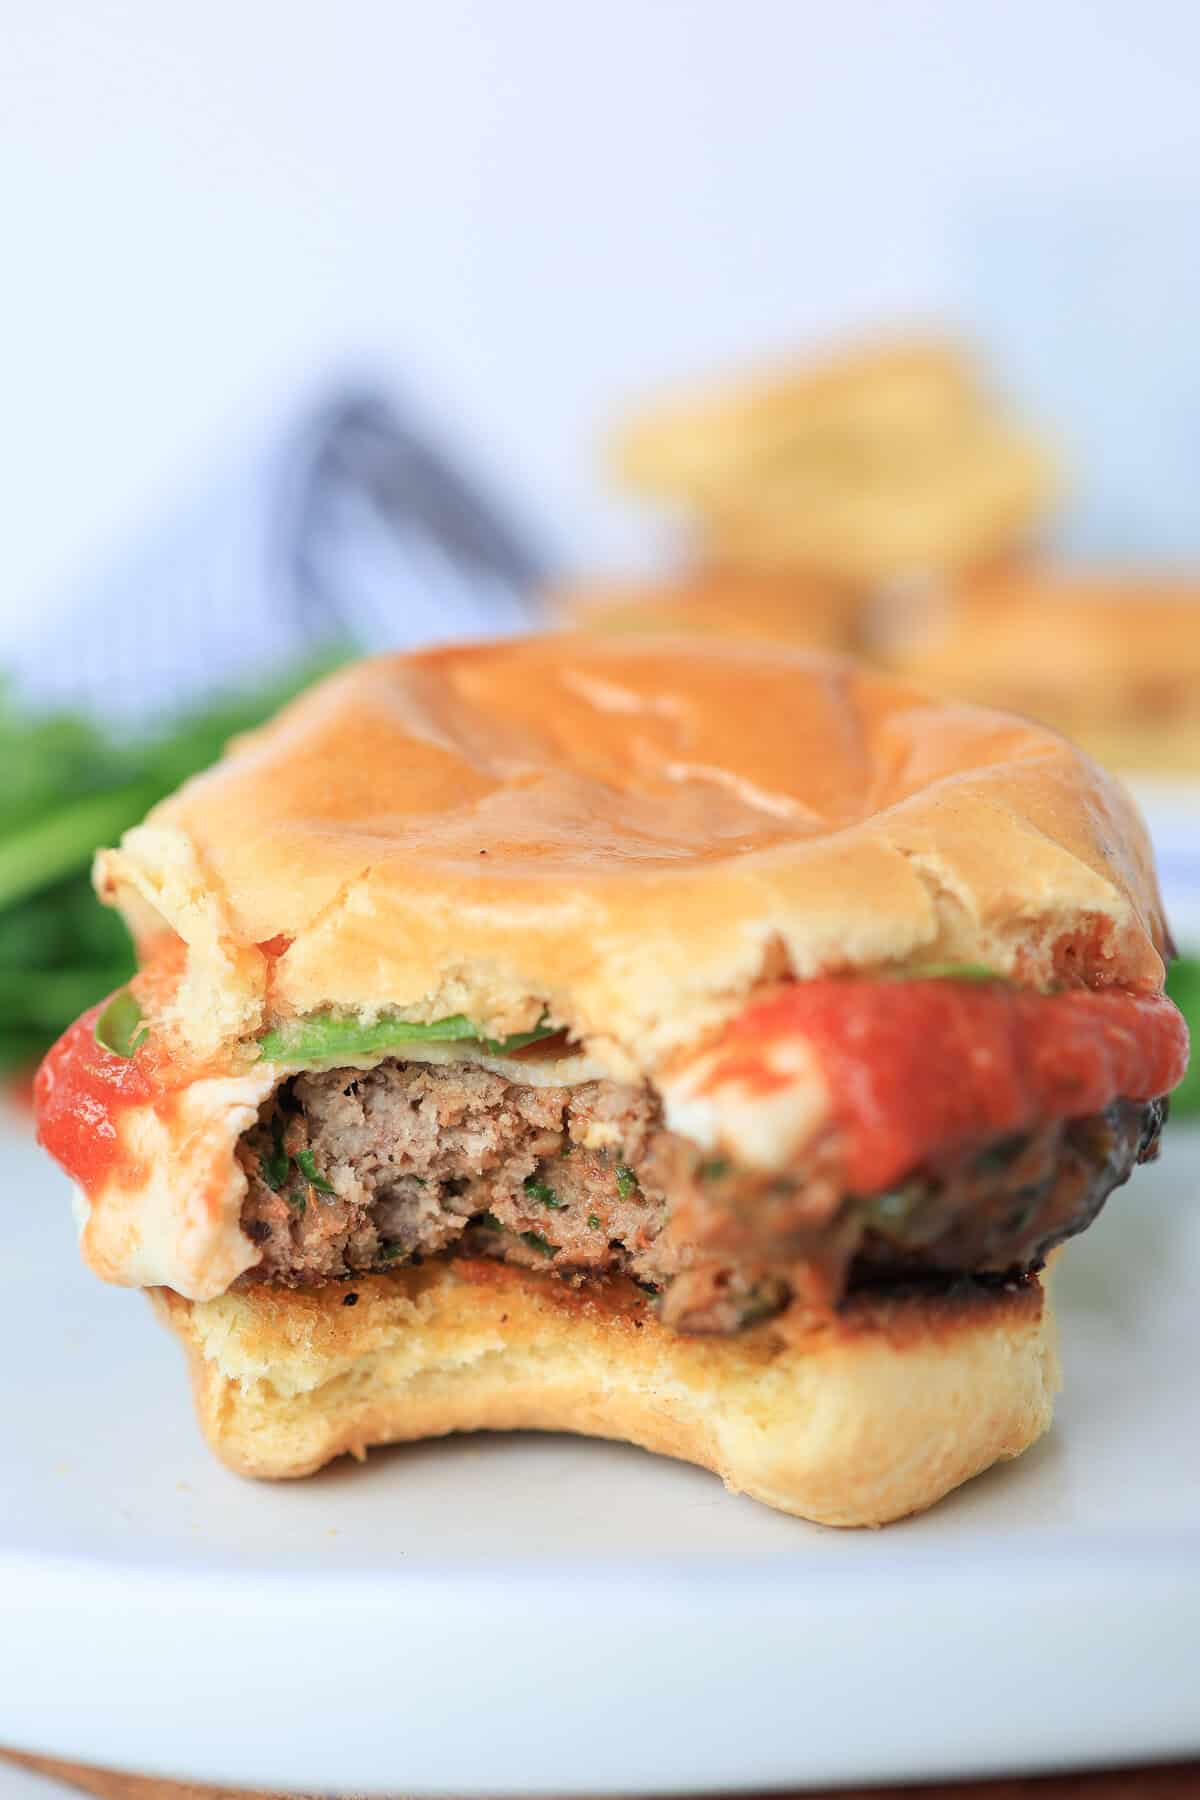
See all the fresh flavor packed into that patty and fun toppings above? Yum!! Enjoy this unique Italian-inspired spin on the standard burger!
How to Video
Mini Italian Burgers
Ingredients
- 2 cloves garlic (minced)
- 1/2 cup fresh flat-leaf parsley (finely chopped; about 1/2 large bunch; sub: 2 1/2 tablespoons dried parsley)
- 1/2 cup Parmesan cheese (grated)
- 2 tablespoons tomato paste
- 1 teaspoon salt
- 1/2 teaspoon freshly ground black pepper
- 1/2 teaspoon dried Italian seasoning (sub: dried oregano)
- 1 1/2 pounds ground beef
- 8 slider buns (sub: mini brioche or ciabatta rolls; see cooking notes for how to toast these)
- 6 slices fresh mozzarella cheese (sub Provolone, cut into smaller pieces as needed)
- Optional toppings: warm marinara sauce and fresh basil leaves OR lettuce, tomato slices, mayonnaise, ketchup, etc.
Instructions
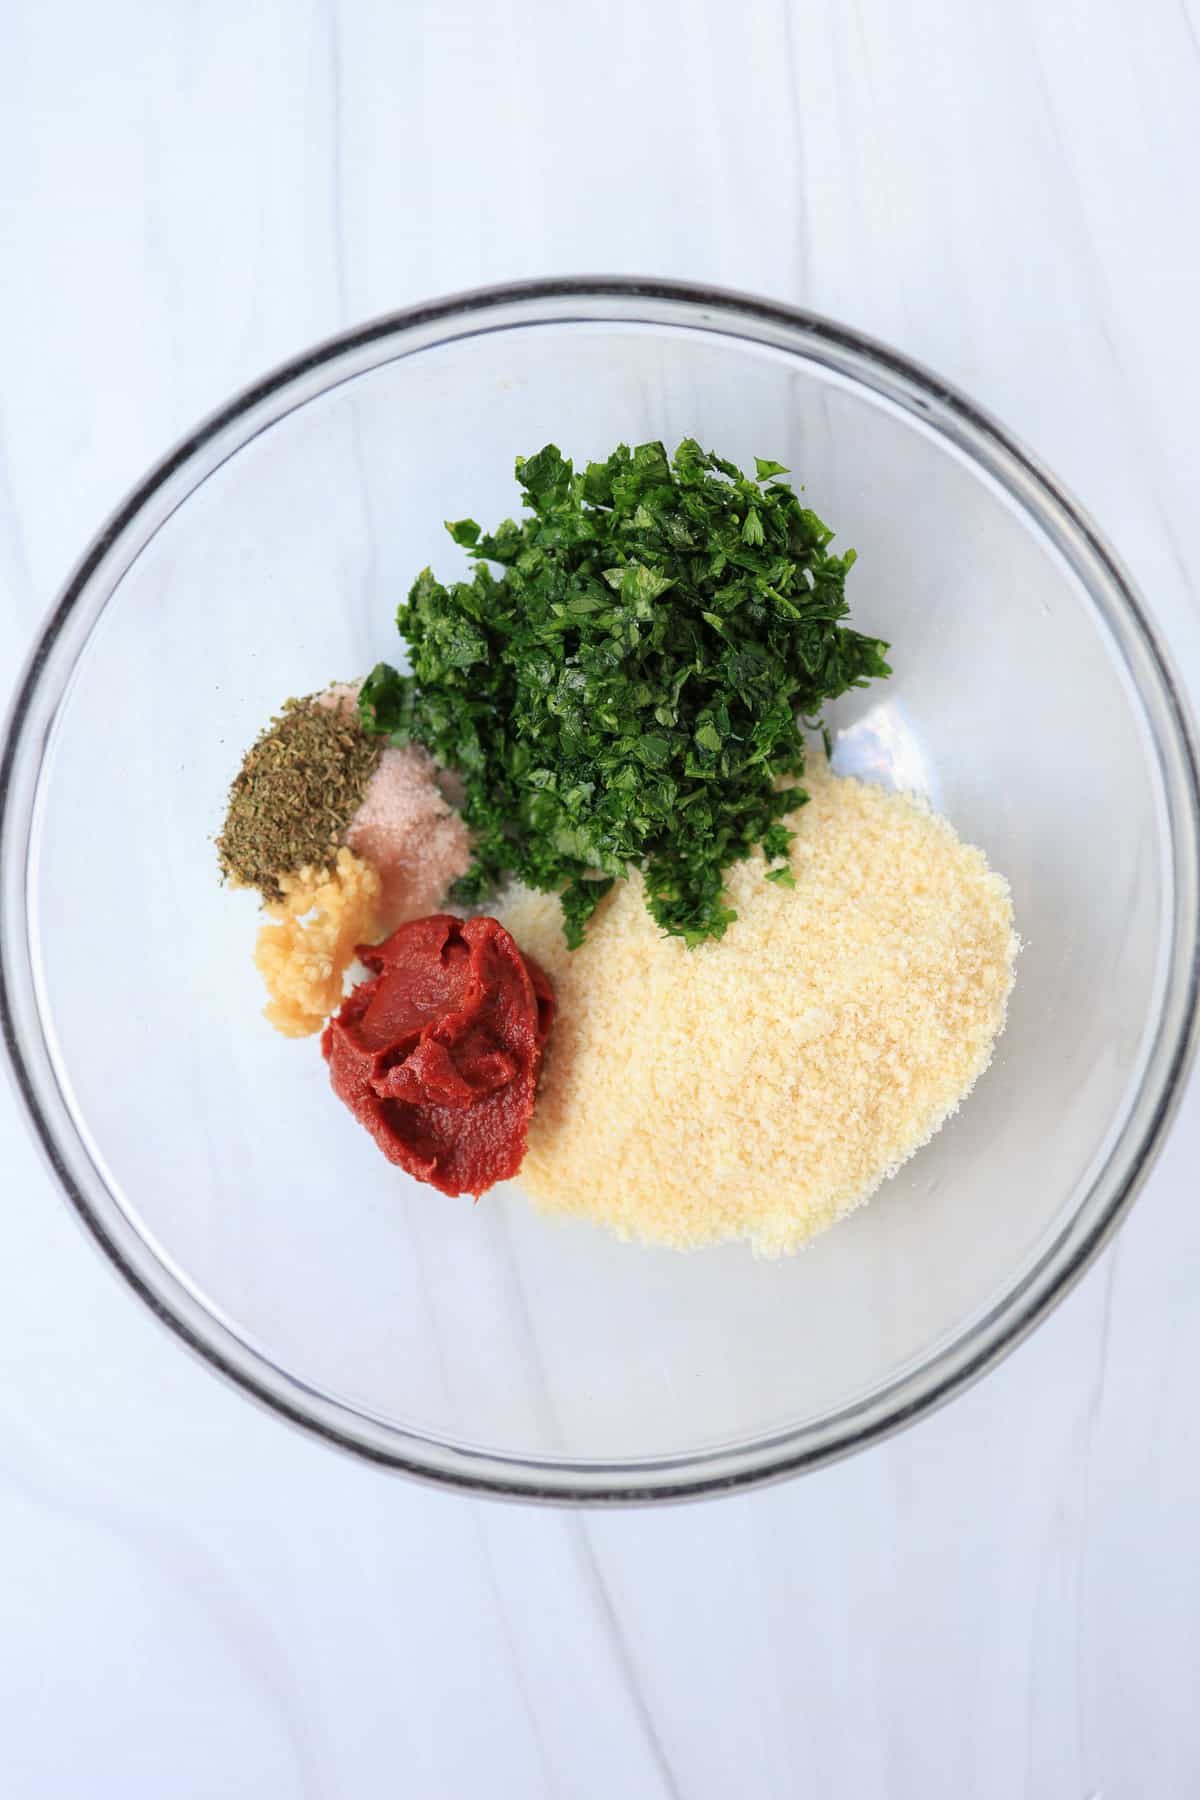
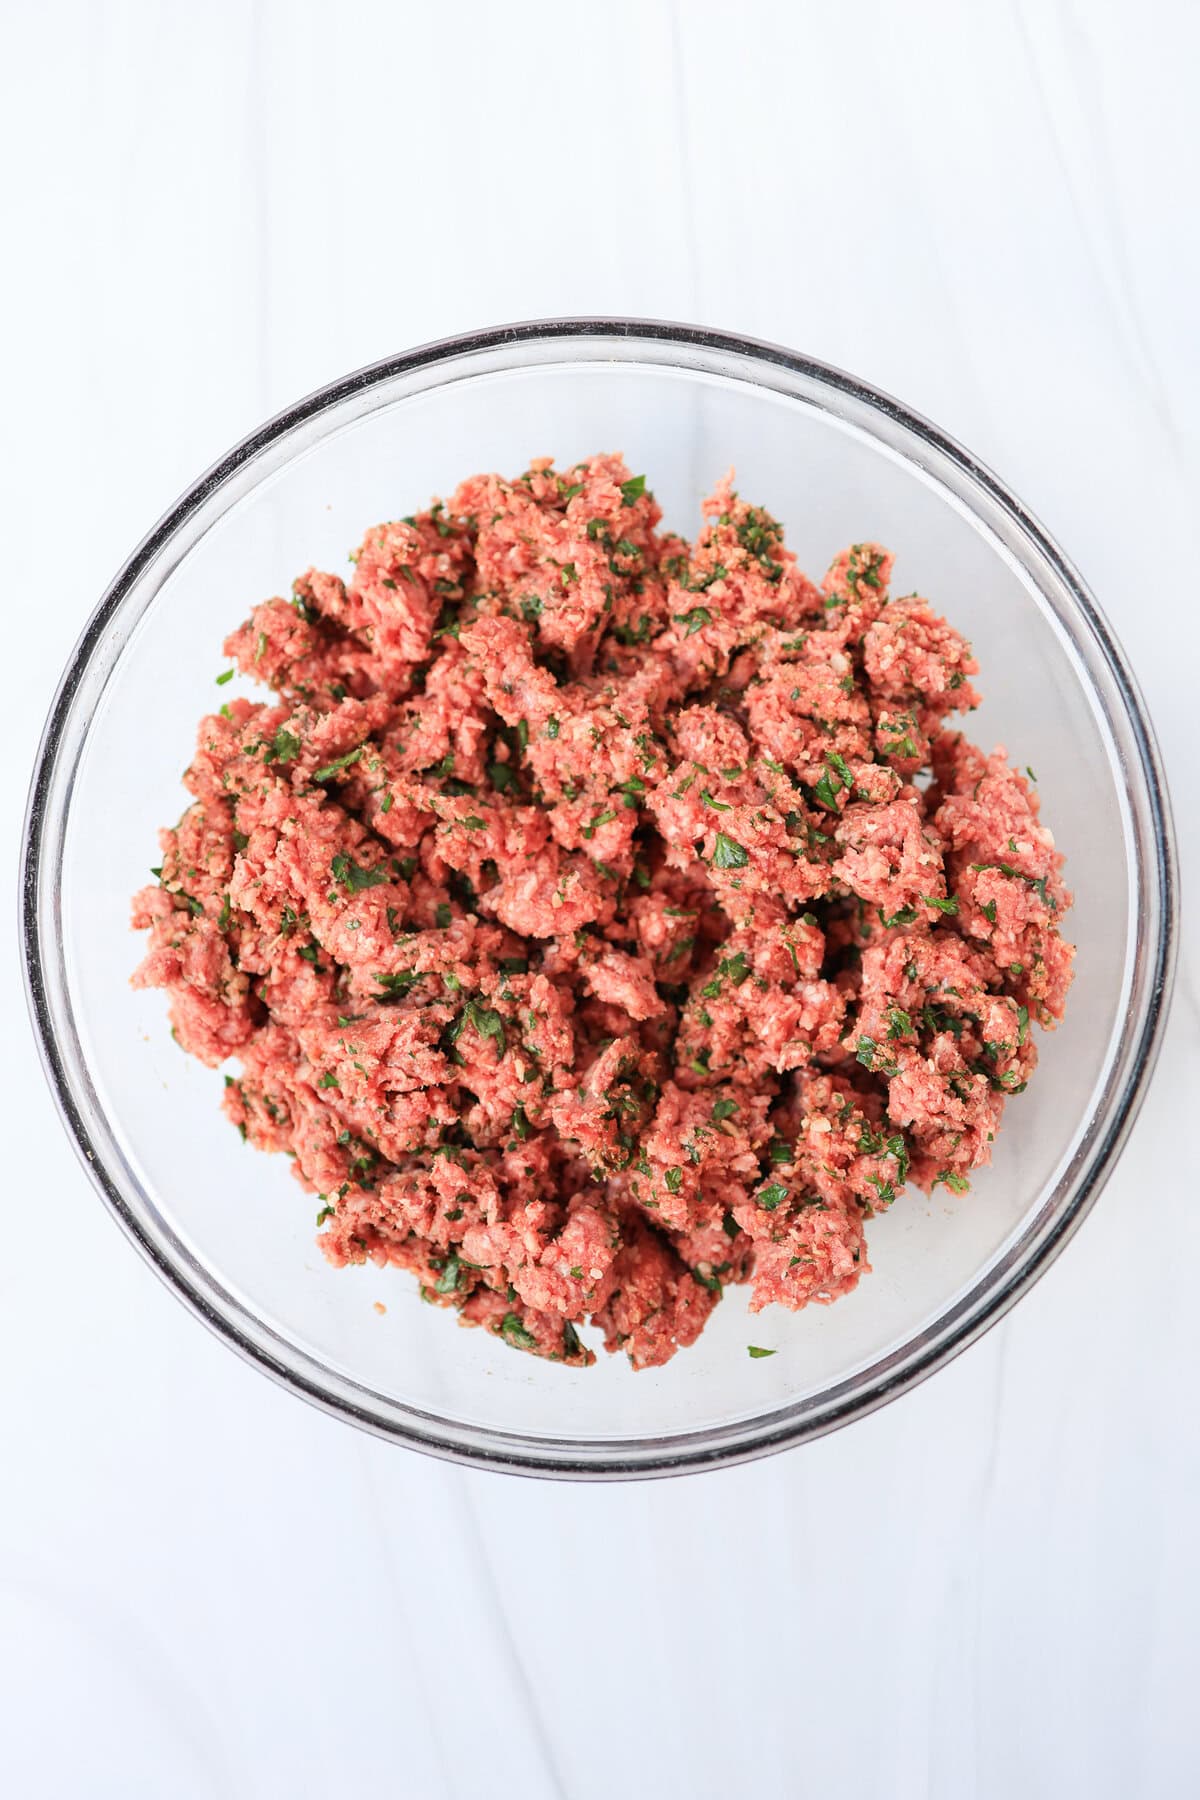
- Combine Meat Mixture: Place the garlic, parsley, Parmesan, tomato paste, salt, pepper, and Italian seasoning in a mixing bowl and stir until combined with a fork (until it's crumbly and fully mixed). Add the ground beef and use your hands or a fork (my preference) to gently combine all the ingredients together, taking care not to compress the mixture.
- Form Patties: Divide the mixture into 8 equal portions (about 3 1/2 ounces per portion). Roll each one into a ball and then shape into small patties that are about 3 1/2 inches wide and 1/2-3/4 inch thick. When forming the patties, leave a little indent in the middle. This helps prevent them from puffing in the middle and turning out like a football shape instead of a burger shape.
- Cook on Stovetop or Grill: Preheat a grill or lightly greased skillet on the stovetop to medium-high heat until hot (400-450°F). Place the burgers on the grill or in the pan and cook for about 3-5 minutes on each side, until cooked through. (Turn the heat down to medium, if they are cooking too fast on the outside.) Add Provolone or fresh mozzarella to the top of each mini burger during the last 1-2 minutes of cooking so it starts to melt. (Note: A well-done burger will register 160°F internally and have no more pink inside.)
- Serve: Serve warm cheese burgers on buns topped with optional warm marinara sauce and fresh basil leaves (or your preferred burger toppings).
Freezer Instructions
Notes/Tips
- To Toast the Buns: Brush the insides of the buns with oil (optional) and toast them on the grill or skillet for 1 to 2 minutes (watch closely so they don’t burn).
- While you certainly don’t need one, I find that having a food scale helps me make uniformly sized burgers. (This is the food scale I own and recommend.)
- If the burgers are done and cheese isn’t melted fully, turn off the heat, cover with a lid, and let the burgers sit for a few minutes.
- For more flavor, you can replace half of the ground beef with ground Italian pork sausage.
- Gluten-Free Version: The only thing you’ll need to change is swap out the slider buns for a gluten-free bun/roll or serve the mini burgers are large lettuce leaves.
- Shortcut: Use your food processor to chop the parsley and garlic.
Nutrition
More Burger and Slider Recipes
Give some of our other popular burger-like recipes a try!

Could the patties be made the day before and just kept in the fridge?
Hi Heather! Yes, I have made them a day ahead. I have also cooked from frozen on the grill and in a skillet, just making sure the internal temp is good.
So delicious! My non burger loving kiddo said it was a keeper [recipe]!
Sweet! Love to hear when we win over those picky eaters. Thanks for leaving a review Jennifer!
These were so flavorful – especially with the pizza sauce and fresh basil. Very good!
This has been a favorite in our household for 10+ years! So glad you like it. Thanks for leaving a review Amy.
Could you thaw frozen beef, mix the cheese and other spices, then refreeze the uncooked patties?
Great question. Yes, absolutely! The USDA says this is perfectly safe. We do it all the time. Just be sure to use it right away after thawing.
Have you ever baked these like your meatballs?
Yum! I ate two and trying not to go back for more! Whole family enjoyed. ☺️
Awesome! Thanks for the review, Meg. Really appreciate the feedback. 🙂